
Let's Get Physical: Unity PBR Tutorial
Jeremy R
Unity PBR Tutorial

The ability to differentiate [and isolate] specific surface details, and then correctly identify which surface map should contain those details, is the key to producing physically accurate results, consistently.


Let's Get Physical!
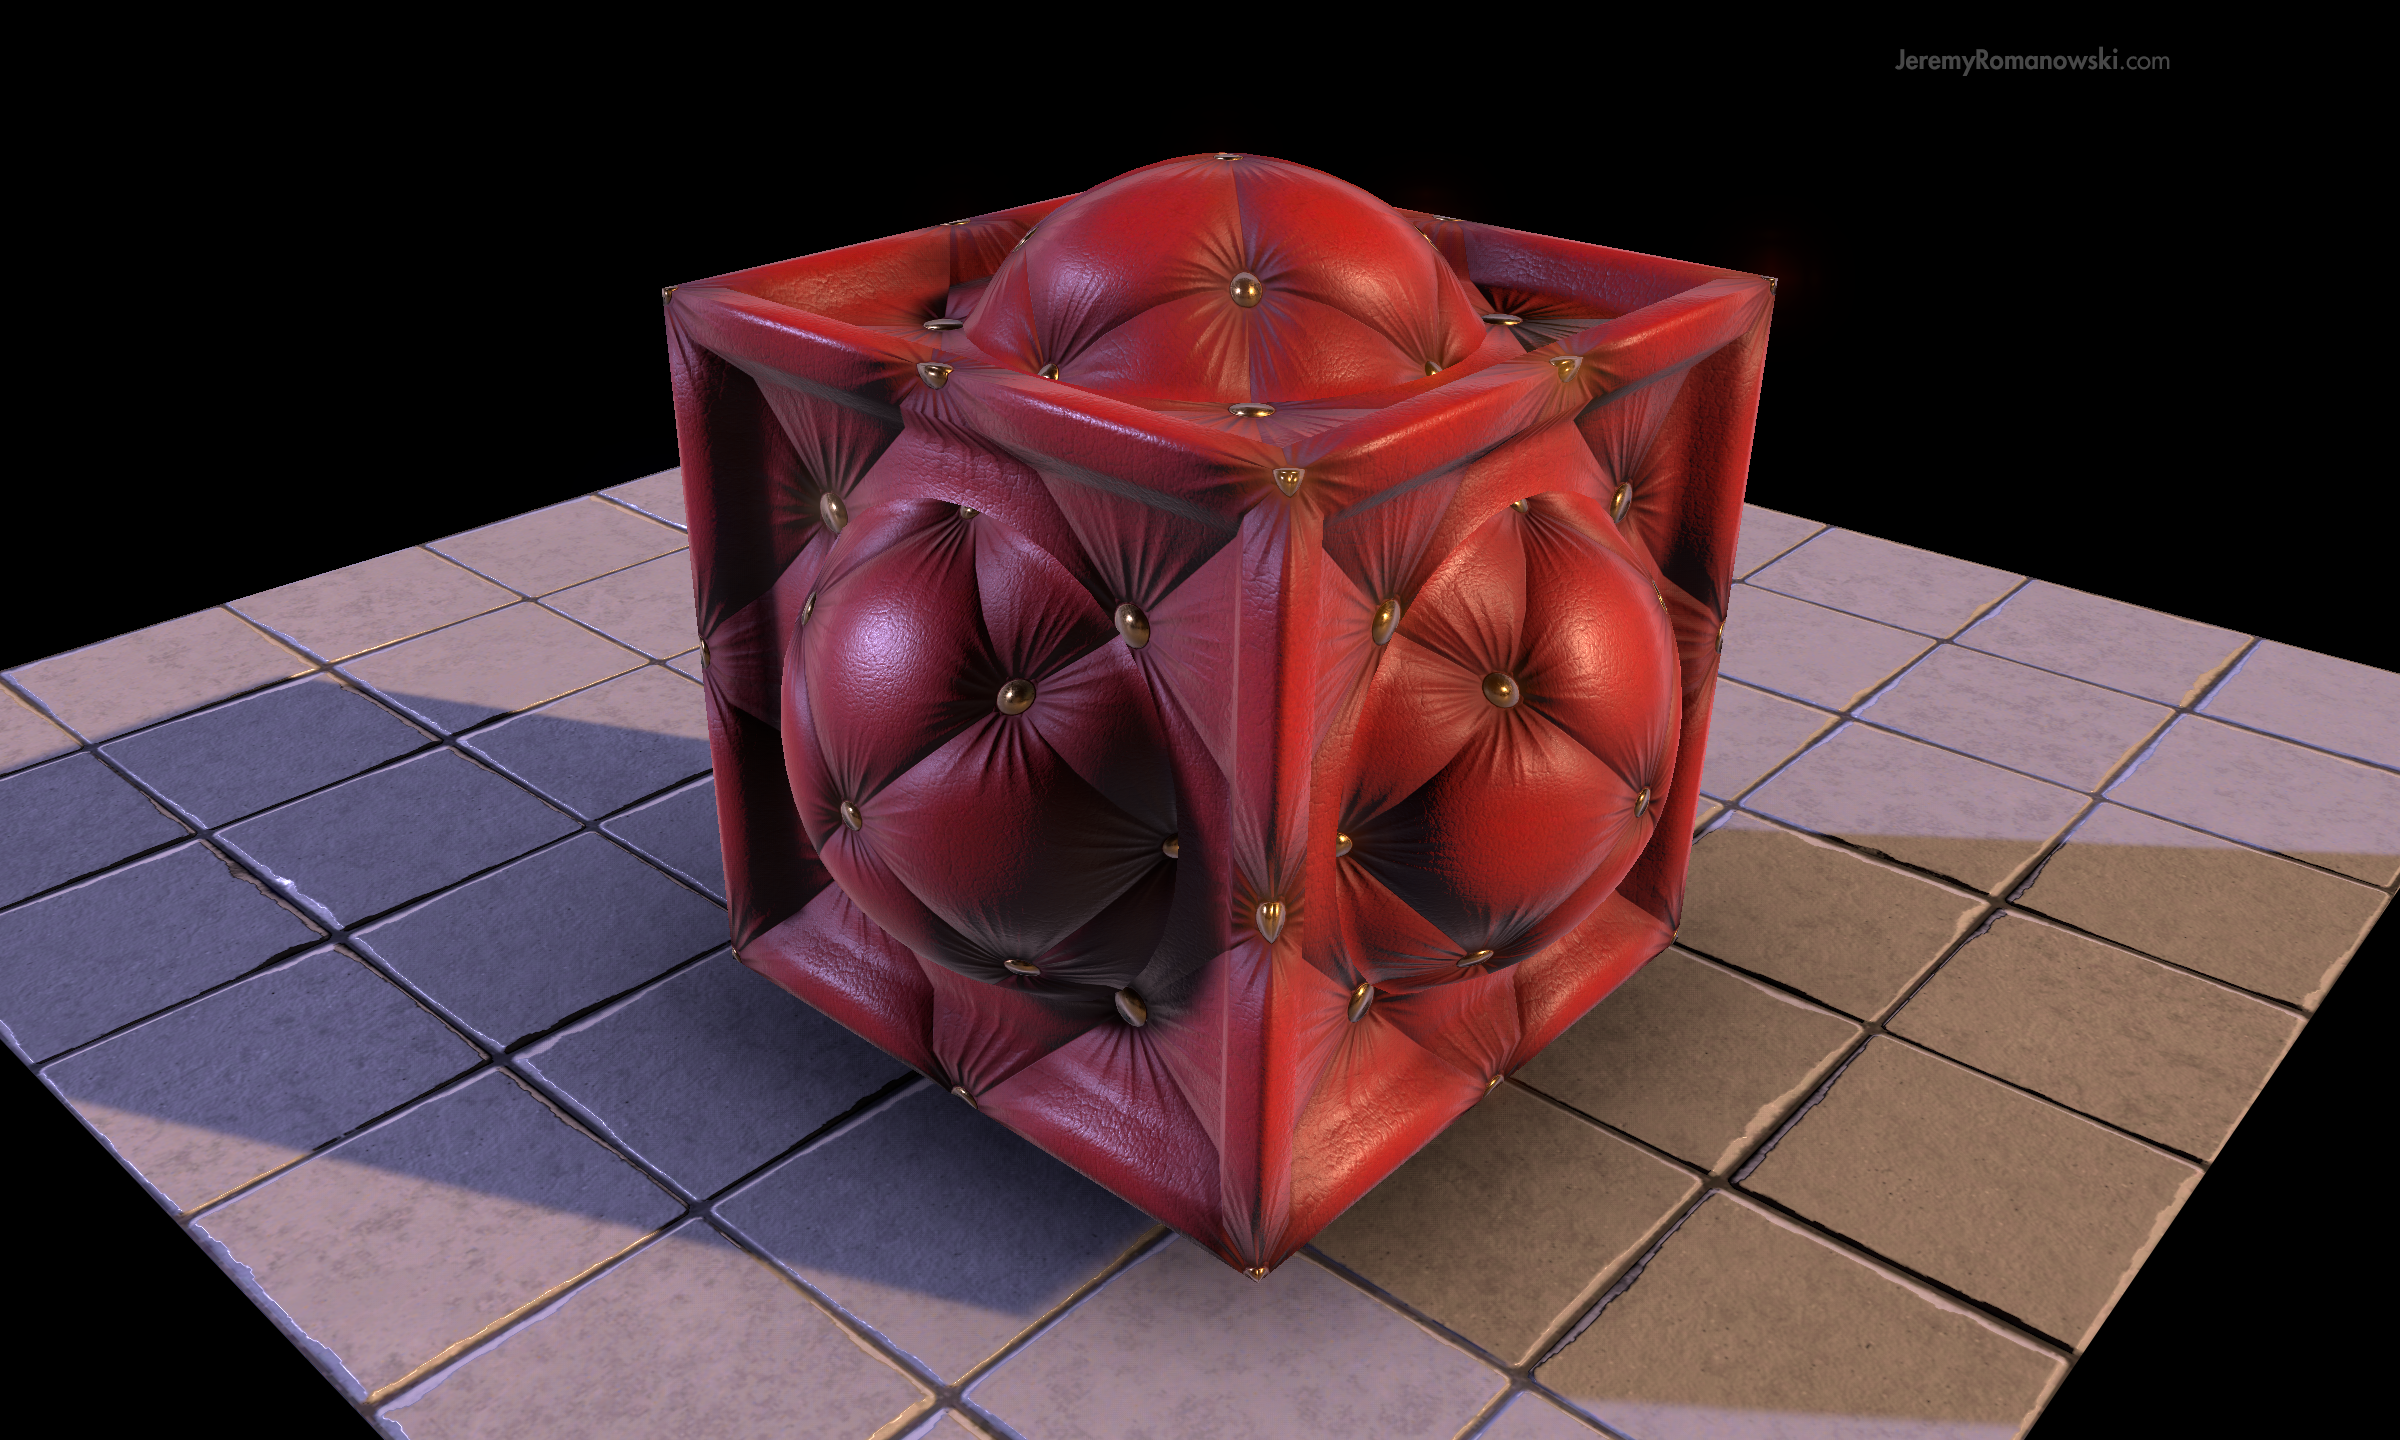
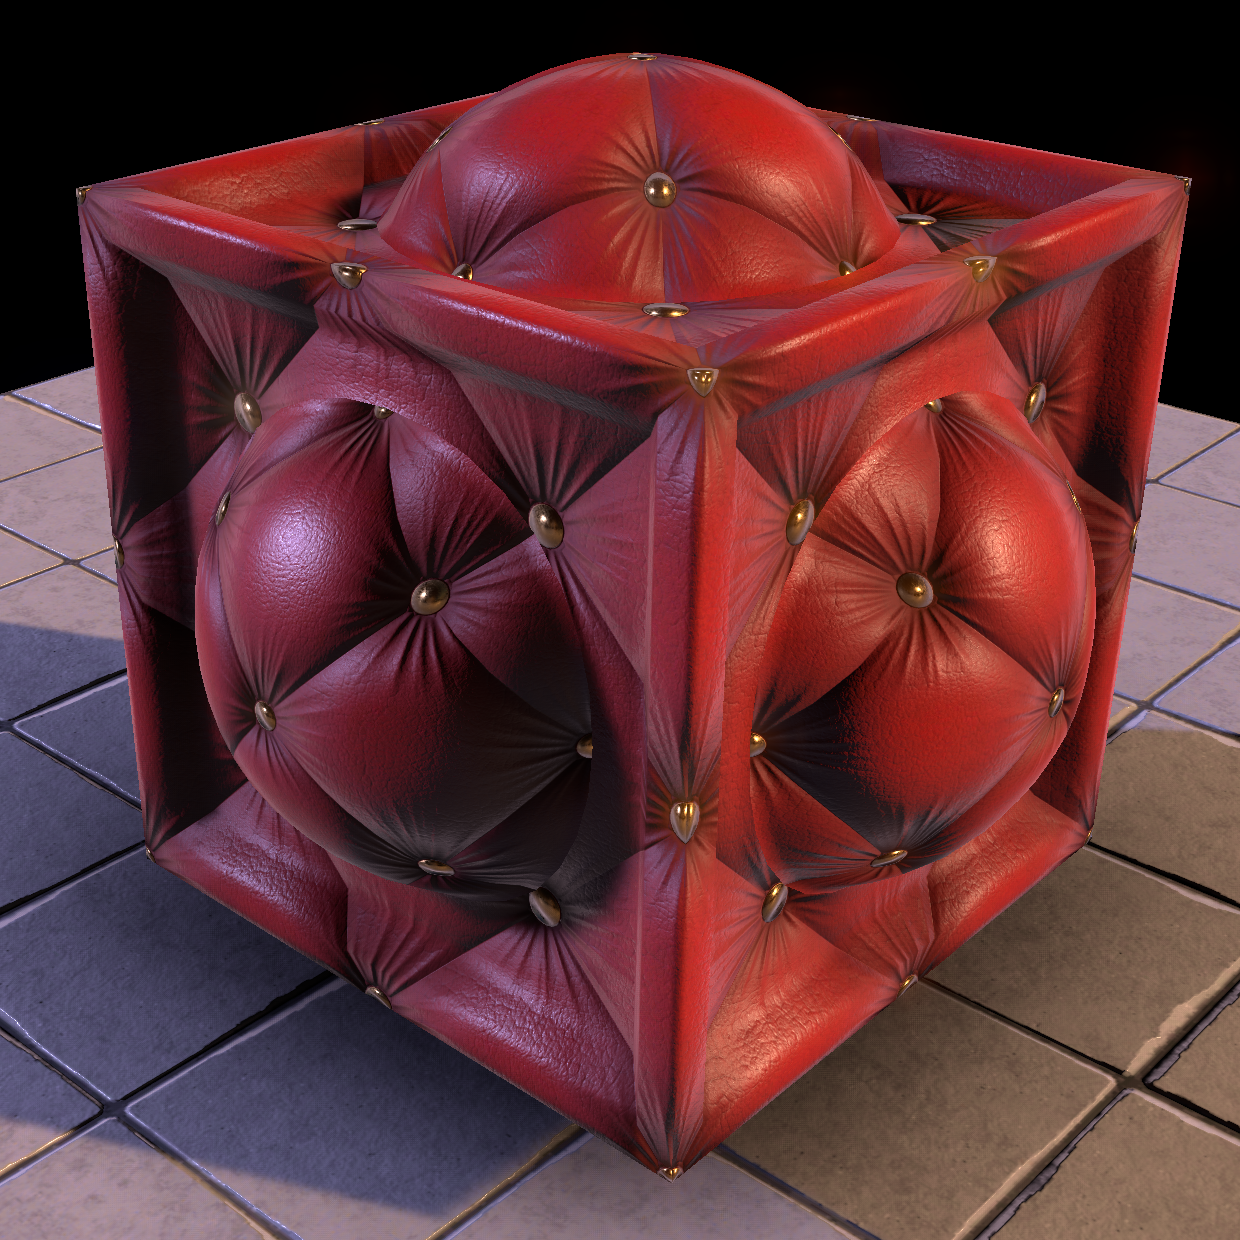
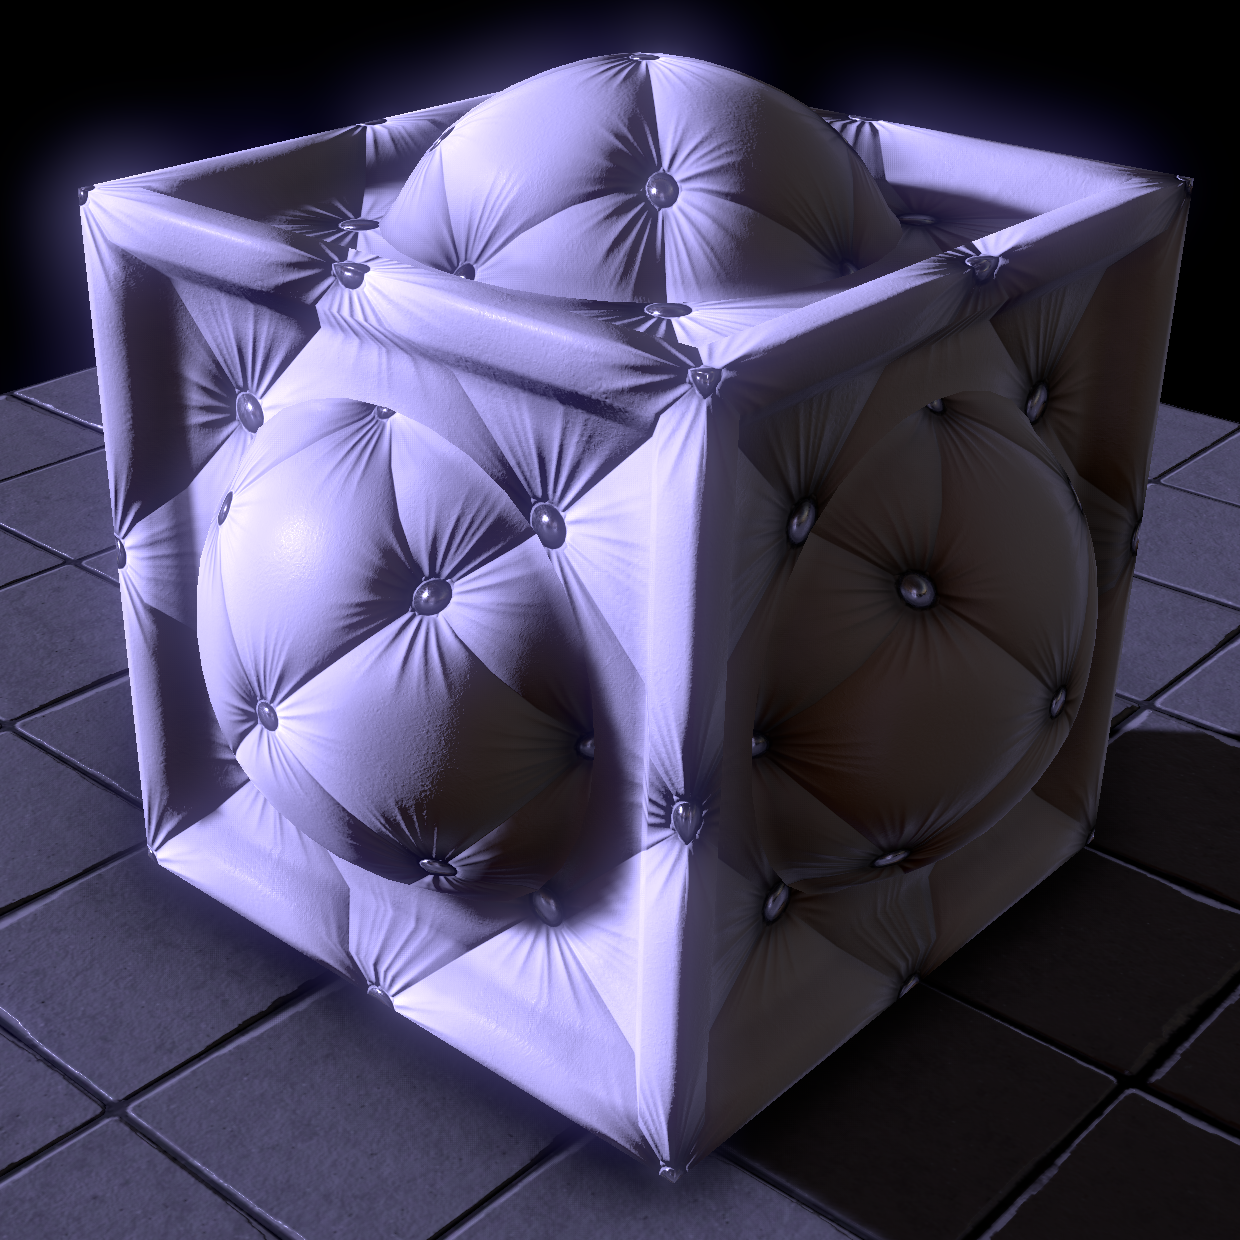
We'll be breaking down the construction of a Chesterfield Sofa material. This is a particularly good case-study for the Metalness* approach to PBR as it has clearly defined transitions between metal (Brass Buttons) and non-metal (Tufted Leather) surfaces.
MATERIAL BREAKDOWN: CHESTERFIELD SOFA
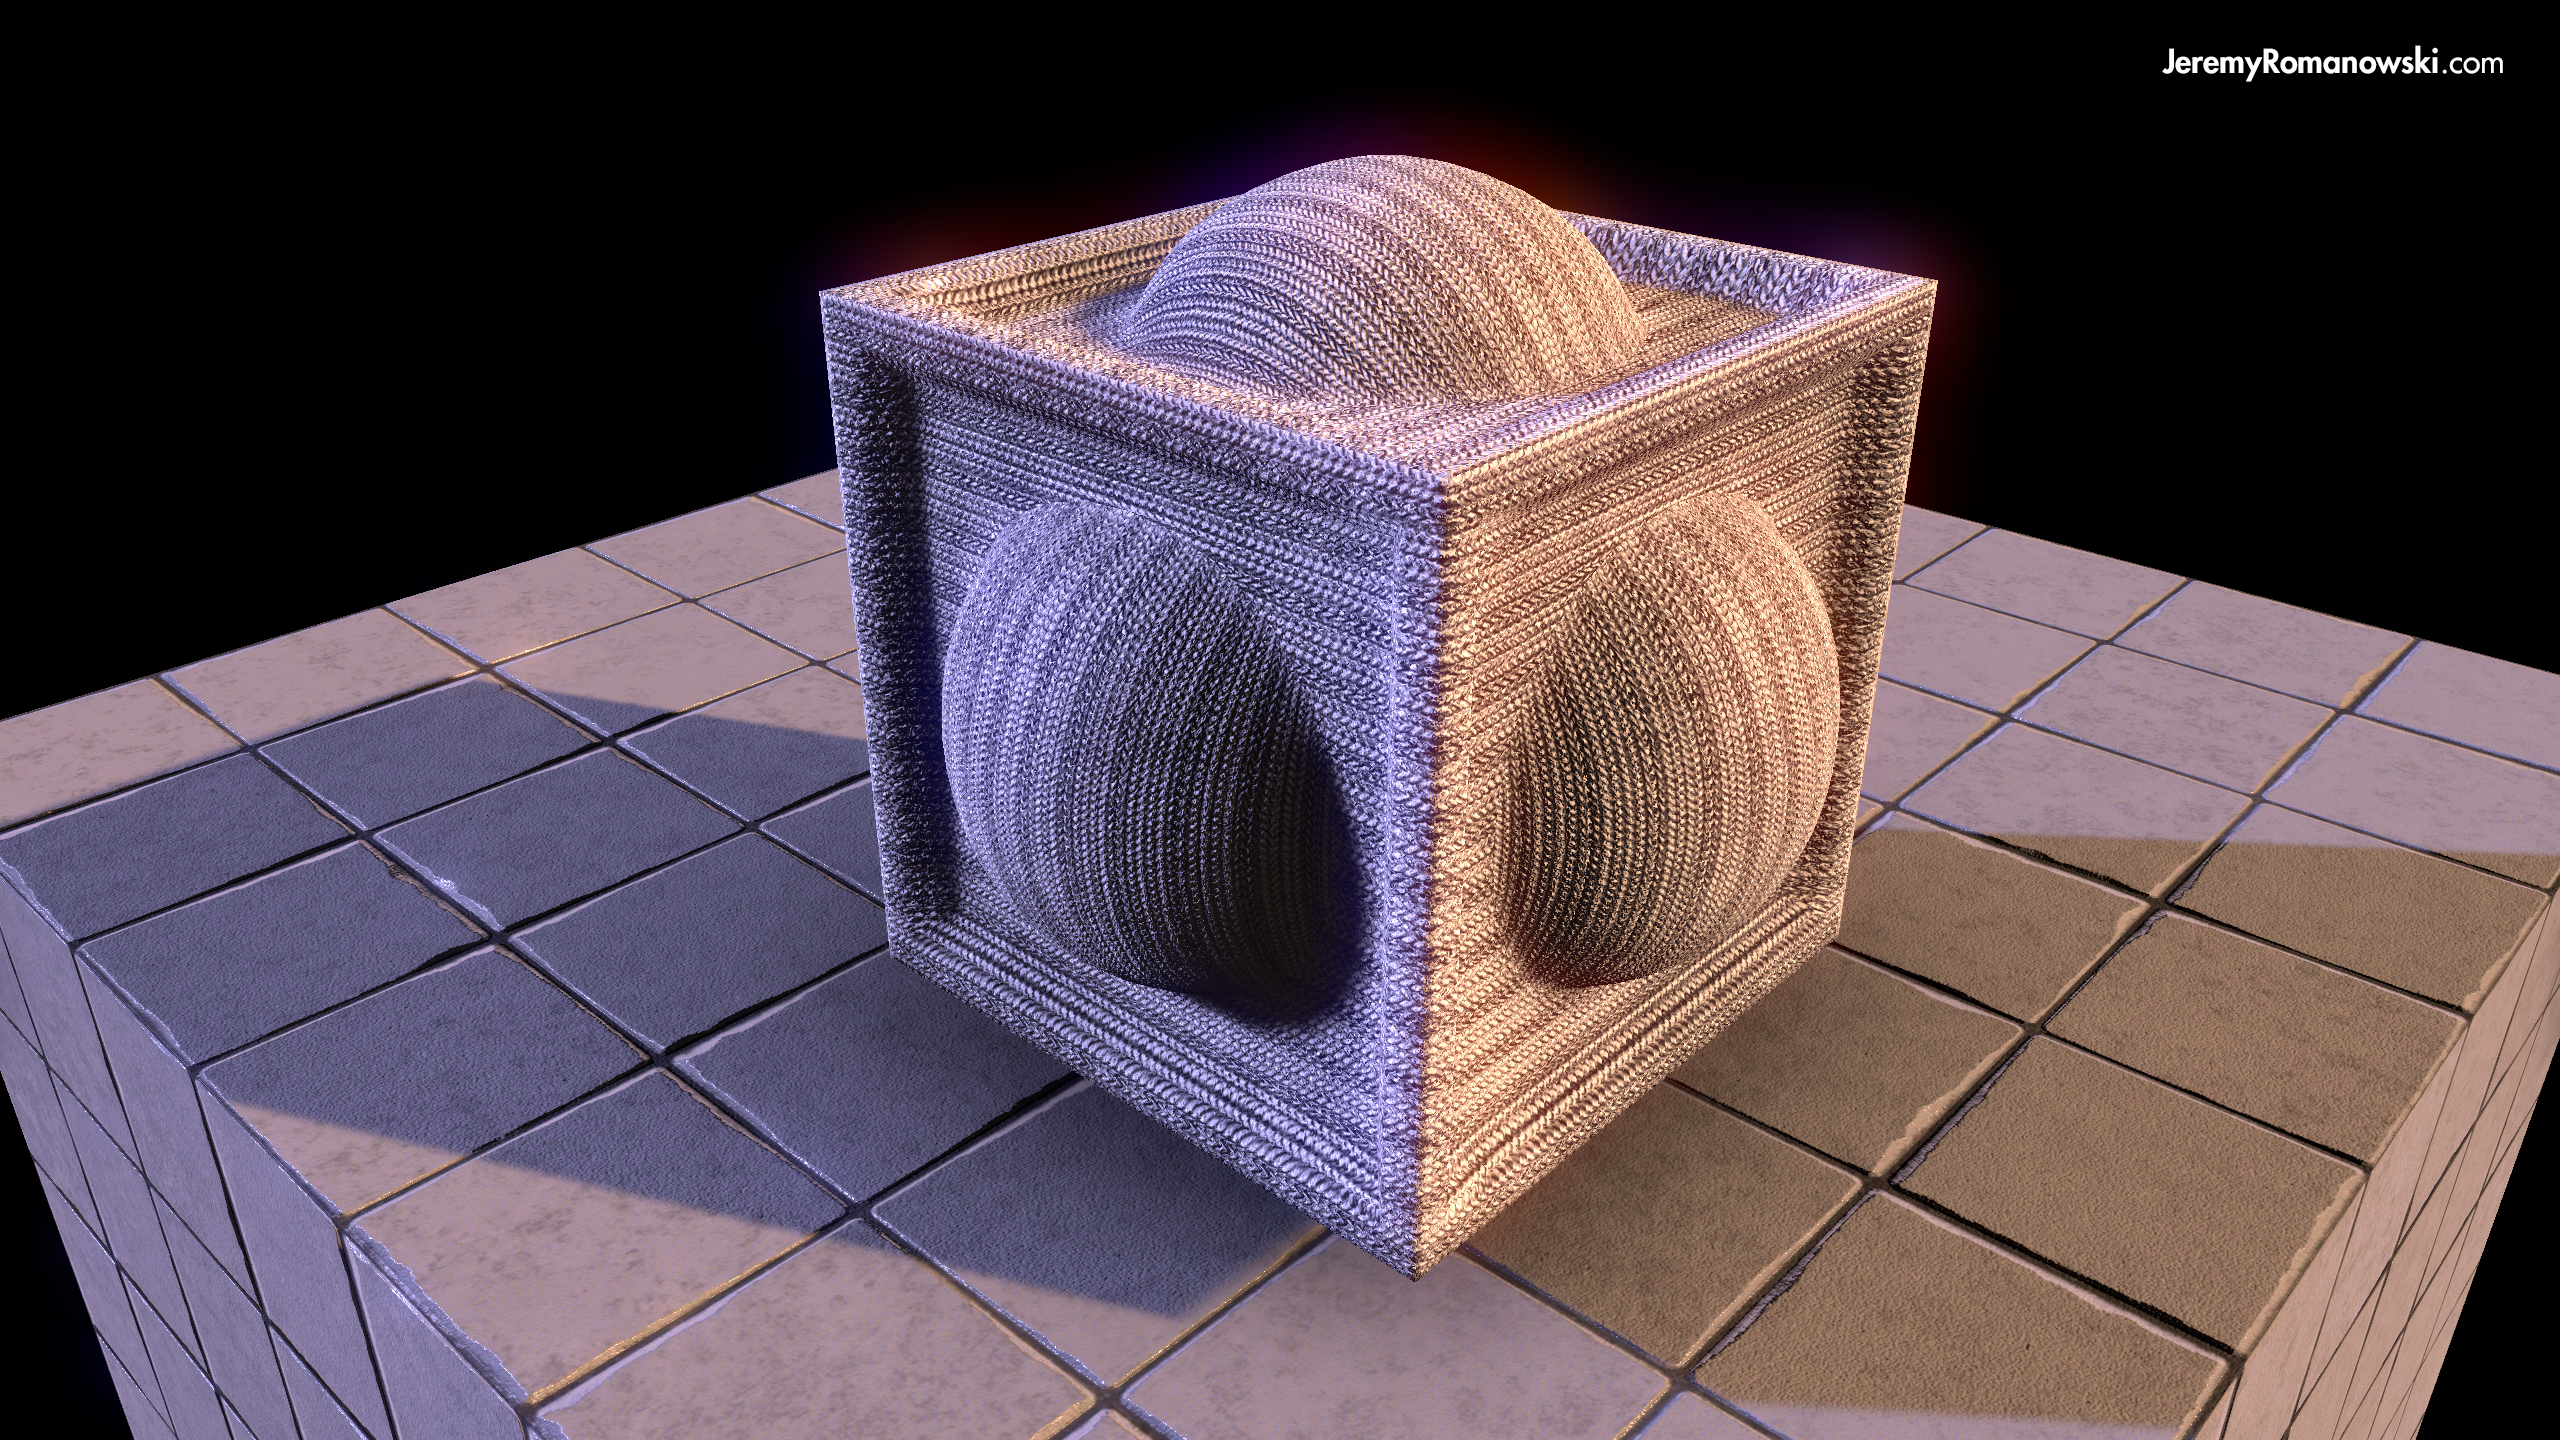
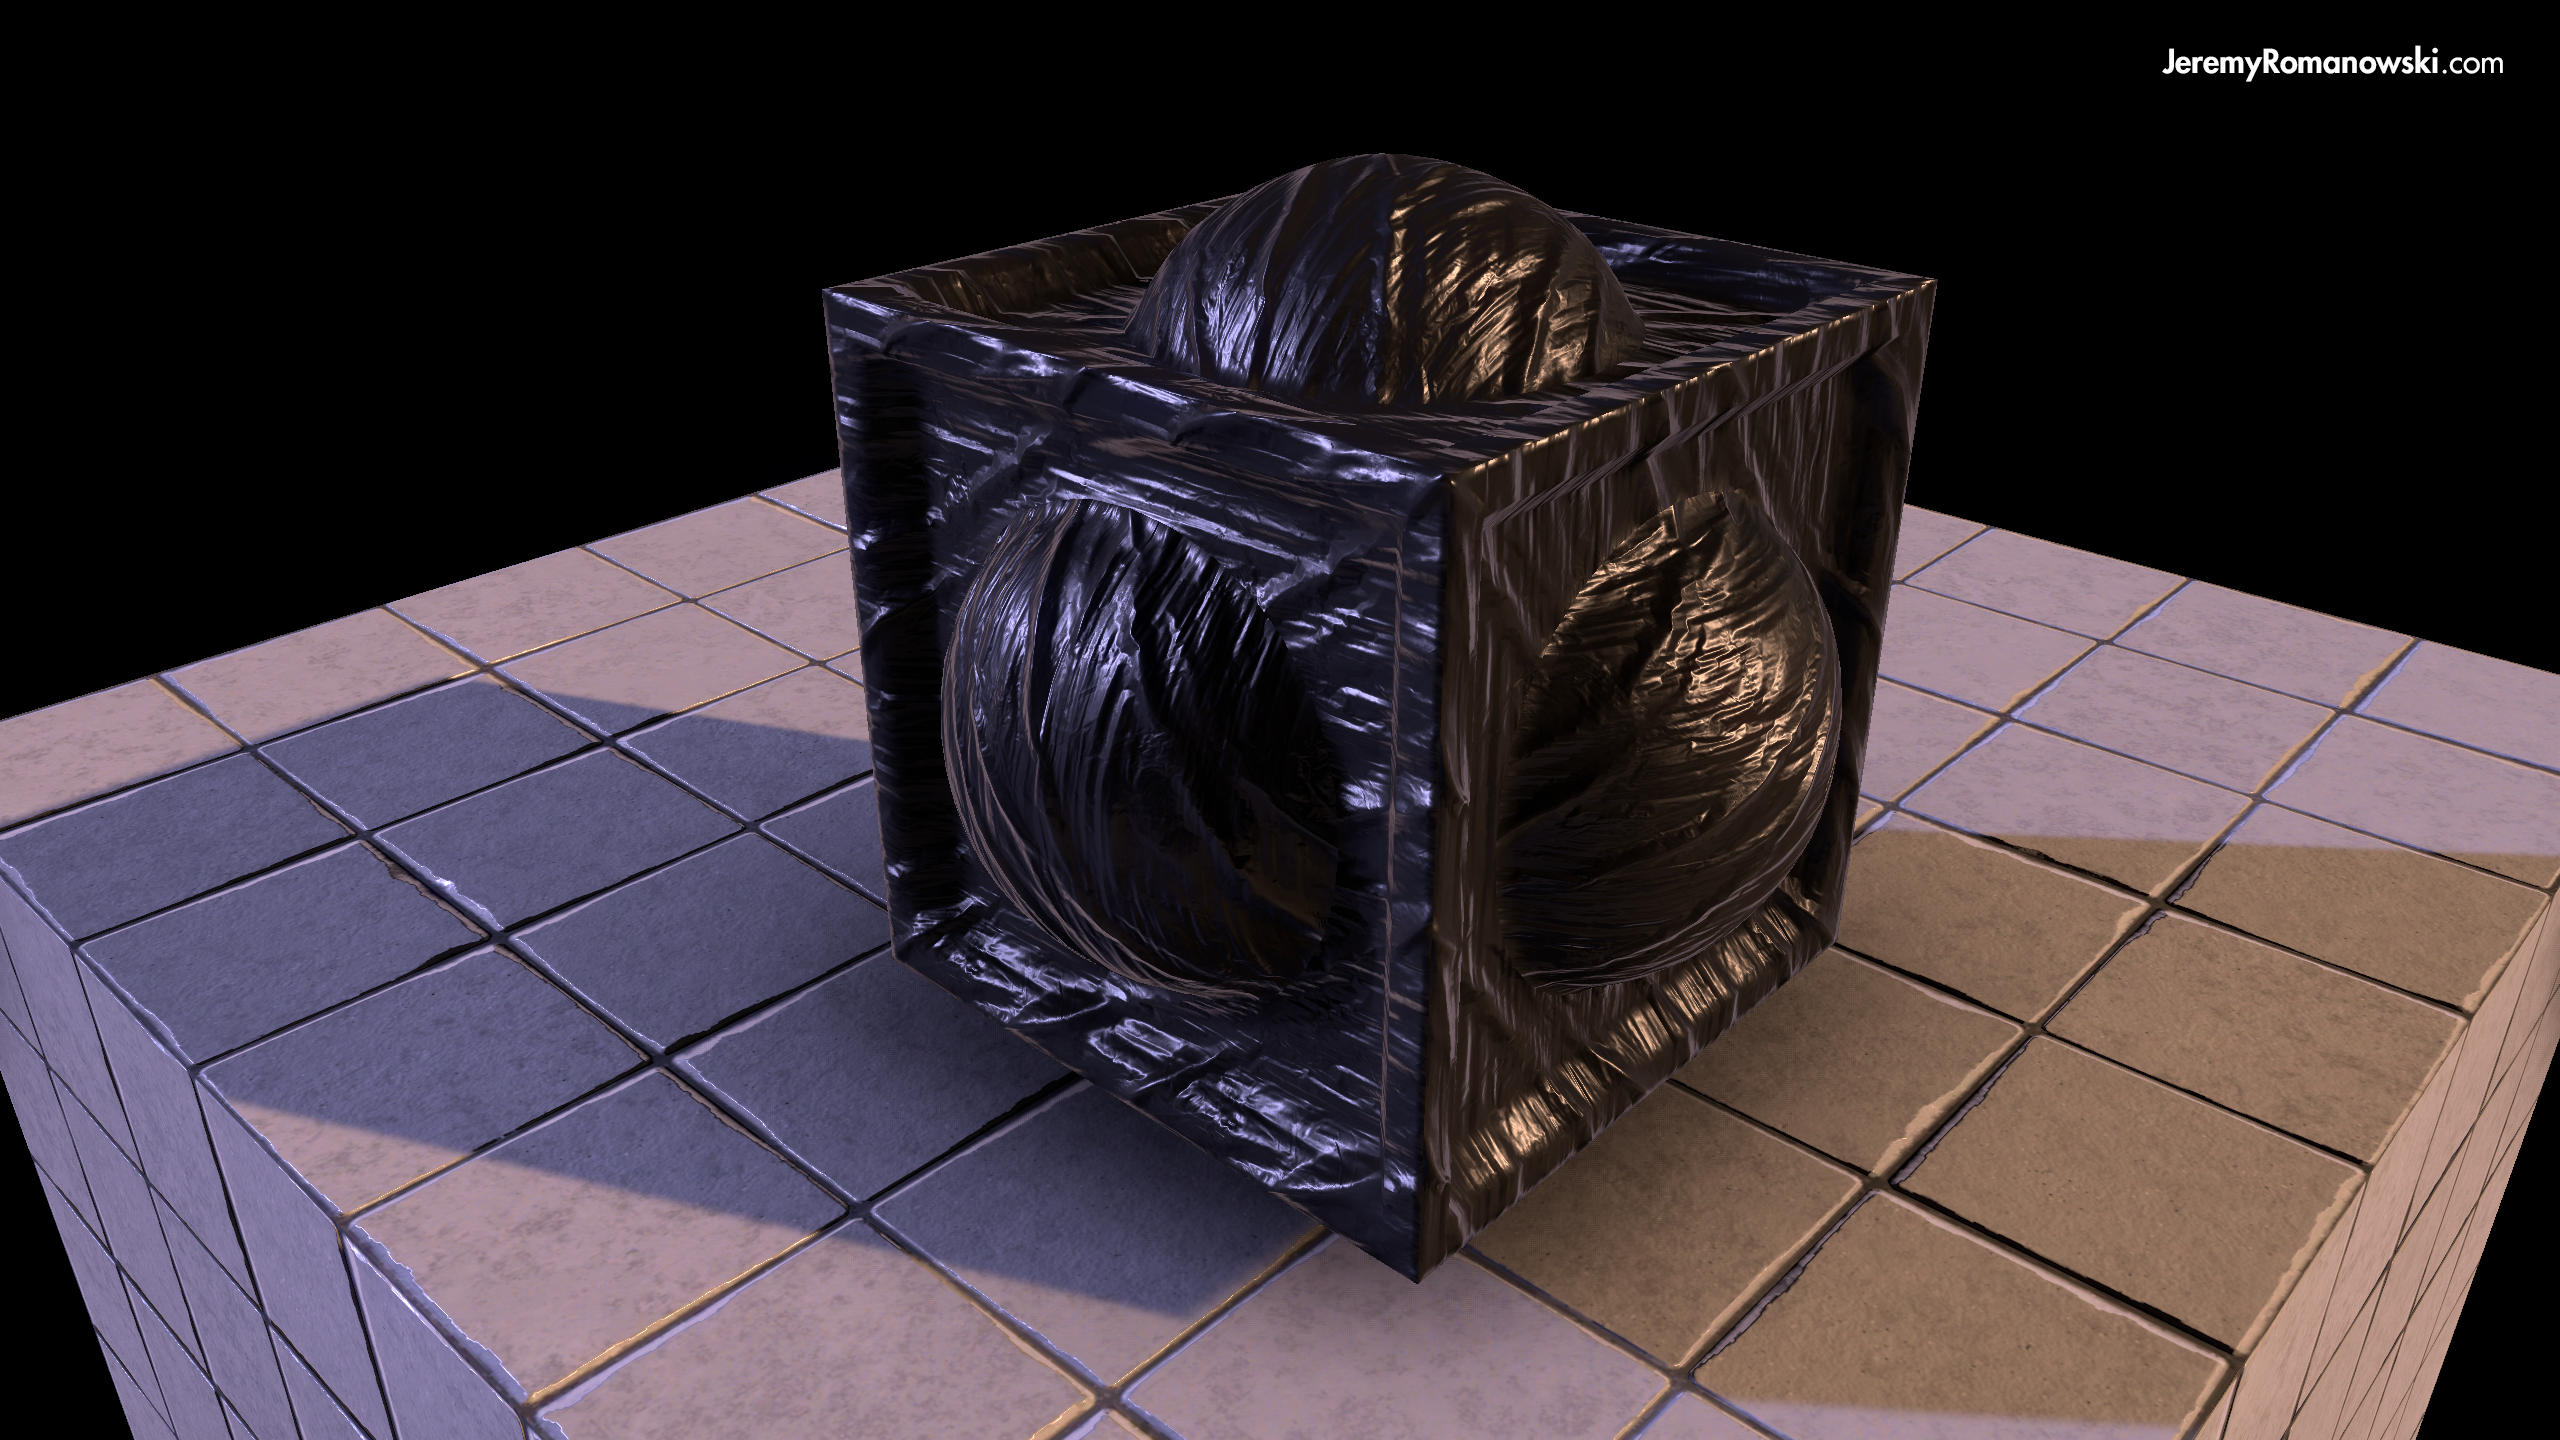
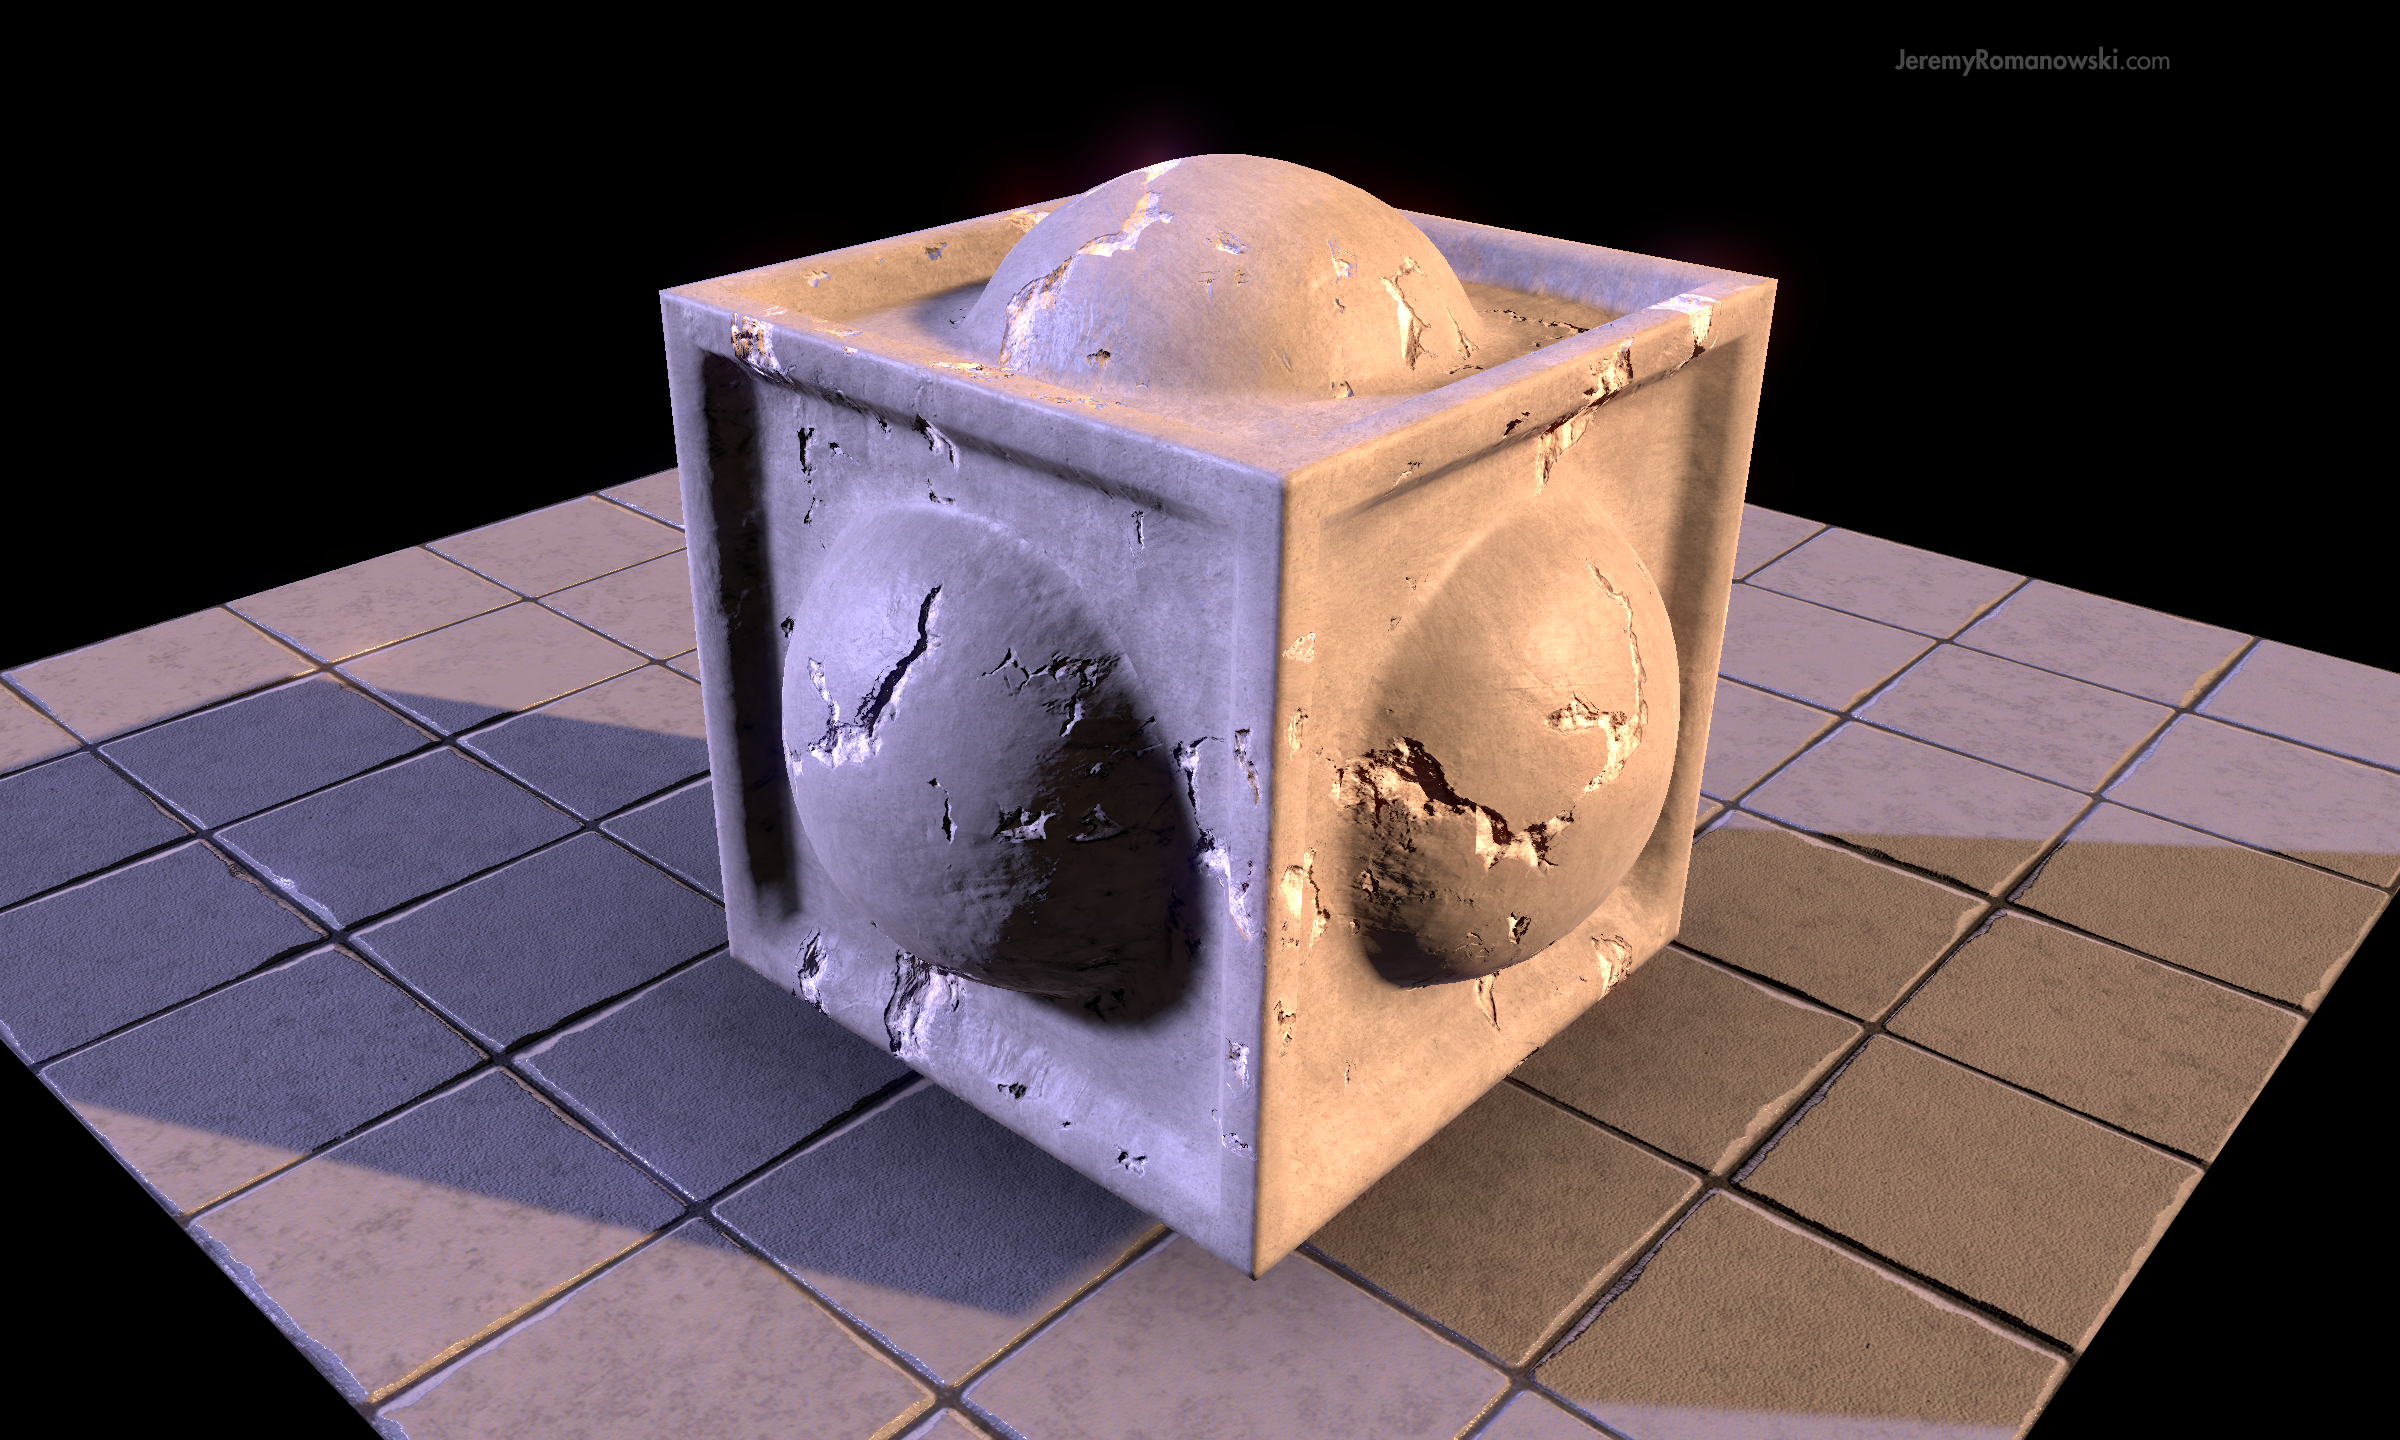
Normal
Normal Map // CLICK FOR FULL SIZE
In PBR, Normal Maps serve to provide directional lighting information for Macro surface details which (for one reason or another) don't merit the overhead of additional geometry.
Macro-Surface Details
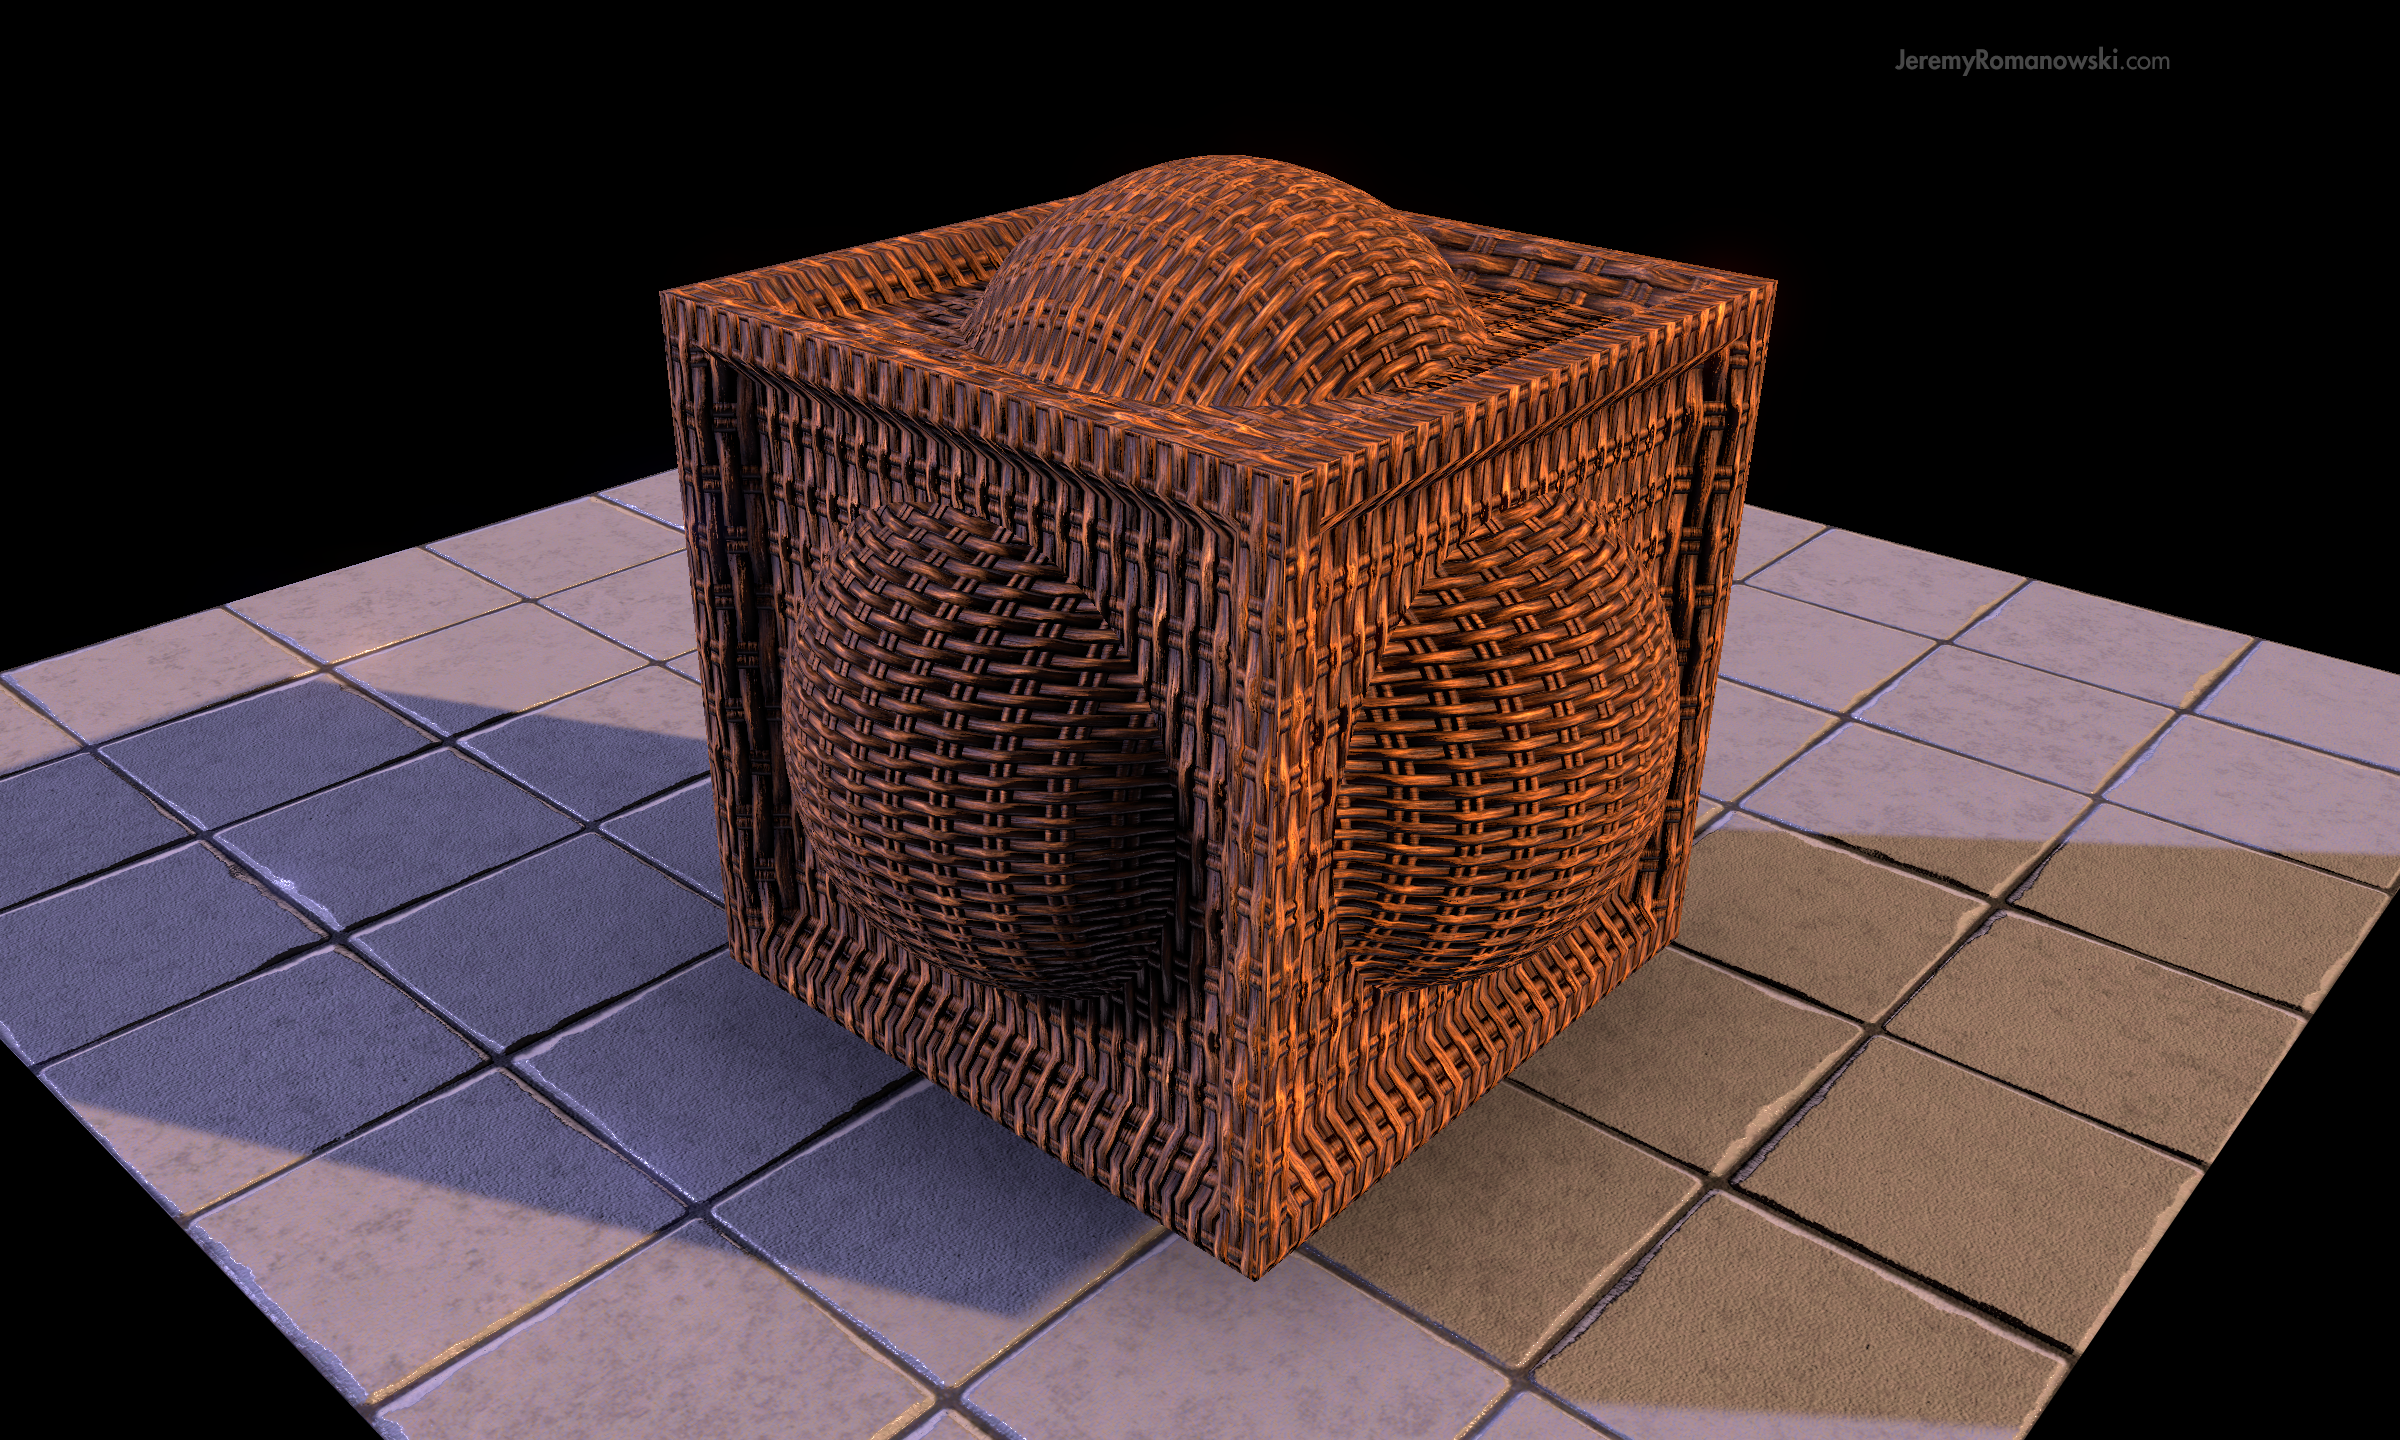
Folds / Wrinkles / Veins
Seams / Stitching / Weave
Bolts / Panels / Greebles
Deep Pitting, Deep Scratches
Protrusions / Extrusions / etc.
Micro-Surface Details
Scuffs / Abrasions / Wear & Tear
Material Tension / Stretching
Perspiration / Water / Condensation
Glass / Frosted Glass
Smoothness / Roughness
Micro-Surface Details, as the name implies, are far subtler surface details which, until recently, were usually found in the Specular Map, or sometimes the Normal Map. An example of this would be adding a noise filter to your Normal Map to simulate a "rough" surface. As we'll see below, this is a no longer a good idea -- in fact it's a terrible idea unless you're literally authoring a 40-grit sandpaper material.
Tactile descriptors like smooth, wet, scuffed, worn, and rough are all considered micro-surface details which don't merit additional normal information. These micro-surface details are best realized in the Smoothness Map. (We'll go into detail about the Smoothness Map below.)
White Albedo // 50% Smoothness // Normal Map // CLICK FOR FULL SIZE
Authoring Normal Maps
You'll want to remove unnecessary noise as much as possible from your Normal Maps and focus your efforts on defining distinct shapes and forms. This is especially important when transitioning to (or from) a metal/non-metal surface due to the (obvious) disparity in surface properties.
Photo-Normal Conversion
Applications like Substance Designer, Crazy Bump, and Quixel's nDo still have a place in a PBR pipeline, make no mistake. Many artists (self-included) enjoy the efficiency of generating normal data from their preferred bitmap-to-normal converter. One of the drawbacks of this process is the increased likelihood of finding artifacts and noise in the generated normals. To remedy this, try reducing the contrast of the photo reference, adjust output curves*, gamma and/or exposure as necessary in order to prepare the photo for a clean conversion.
* If you're using level adjustments rather than curve adjustments, the time is now to adopt a curves-based workflow. Level adjustments have the propensity to break the histogram, especially when clamping down the global value range.
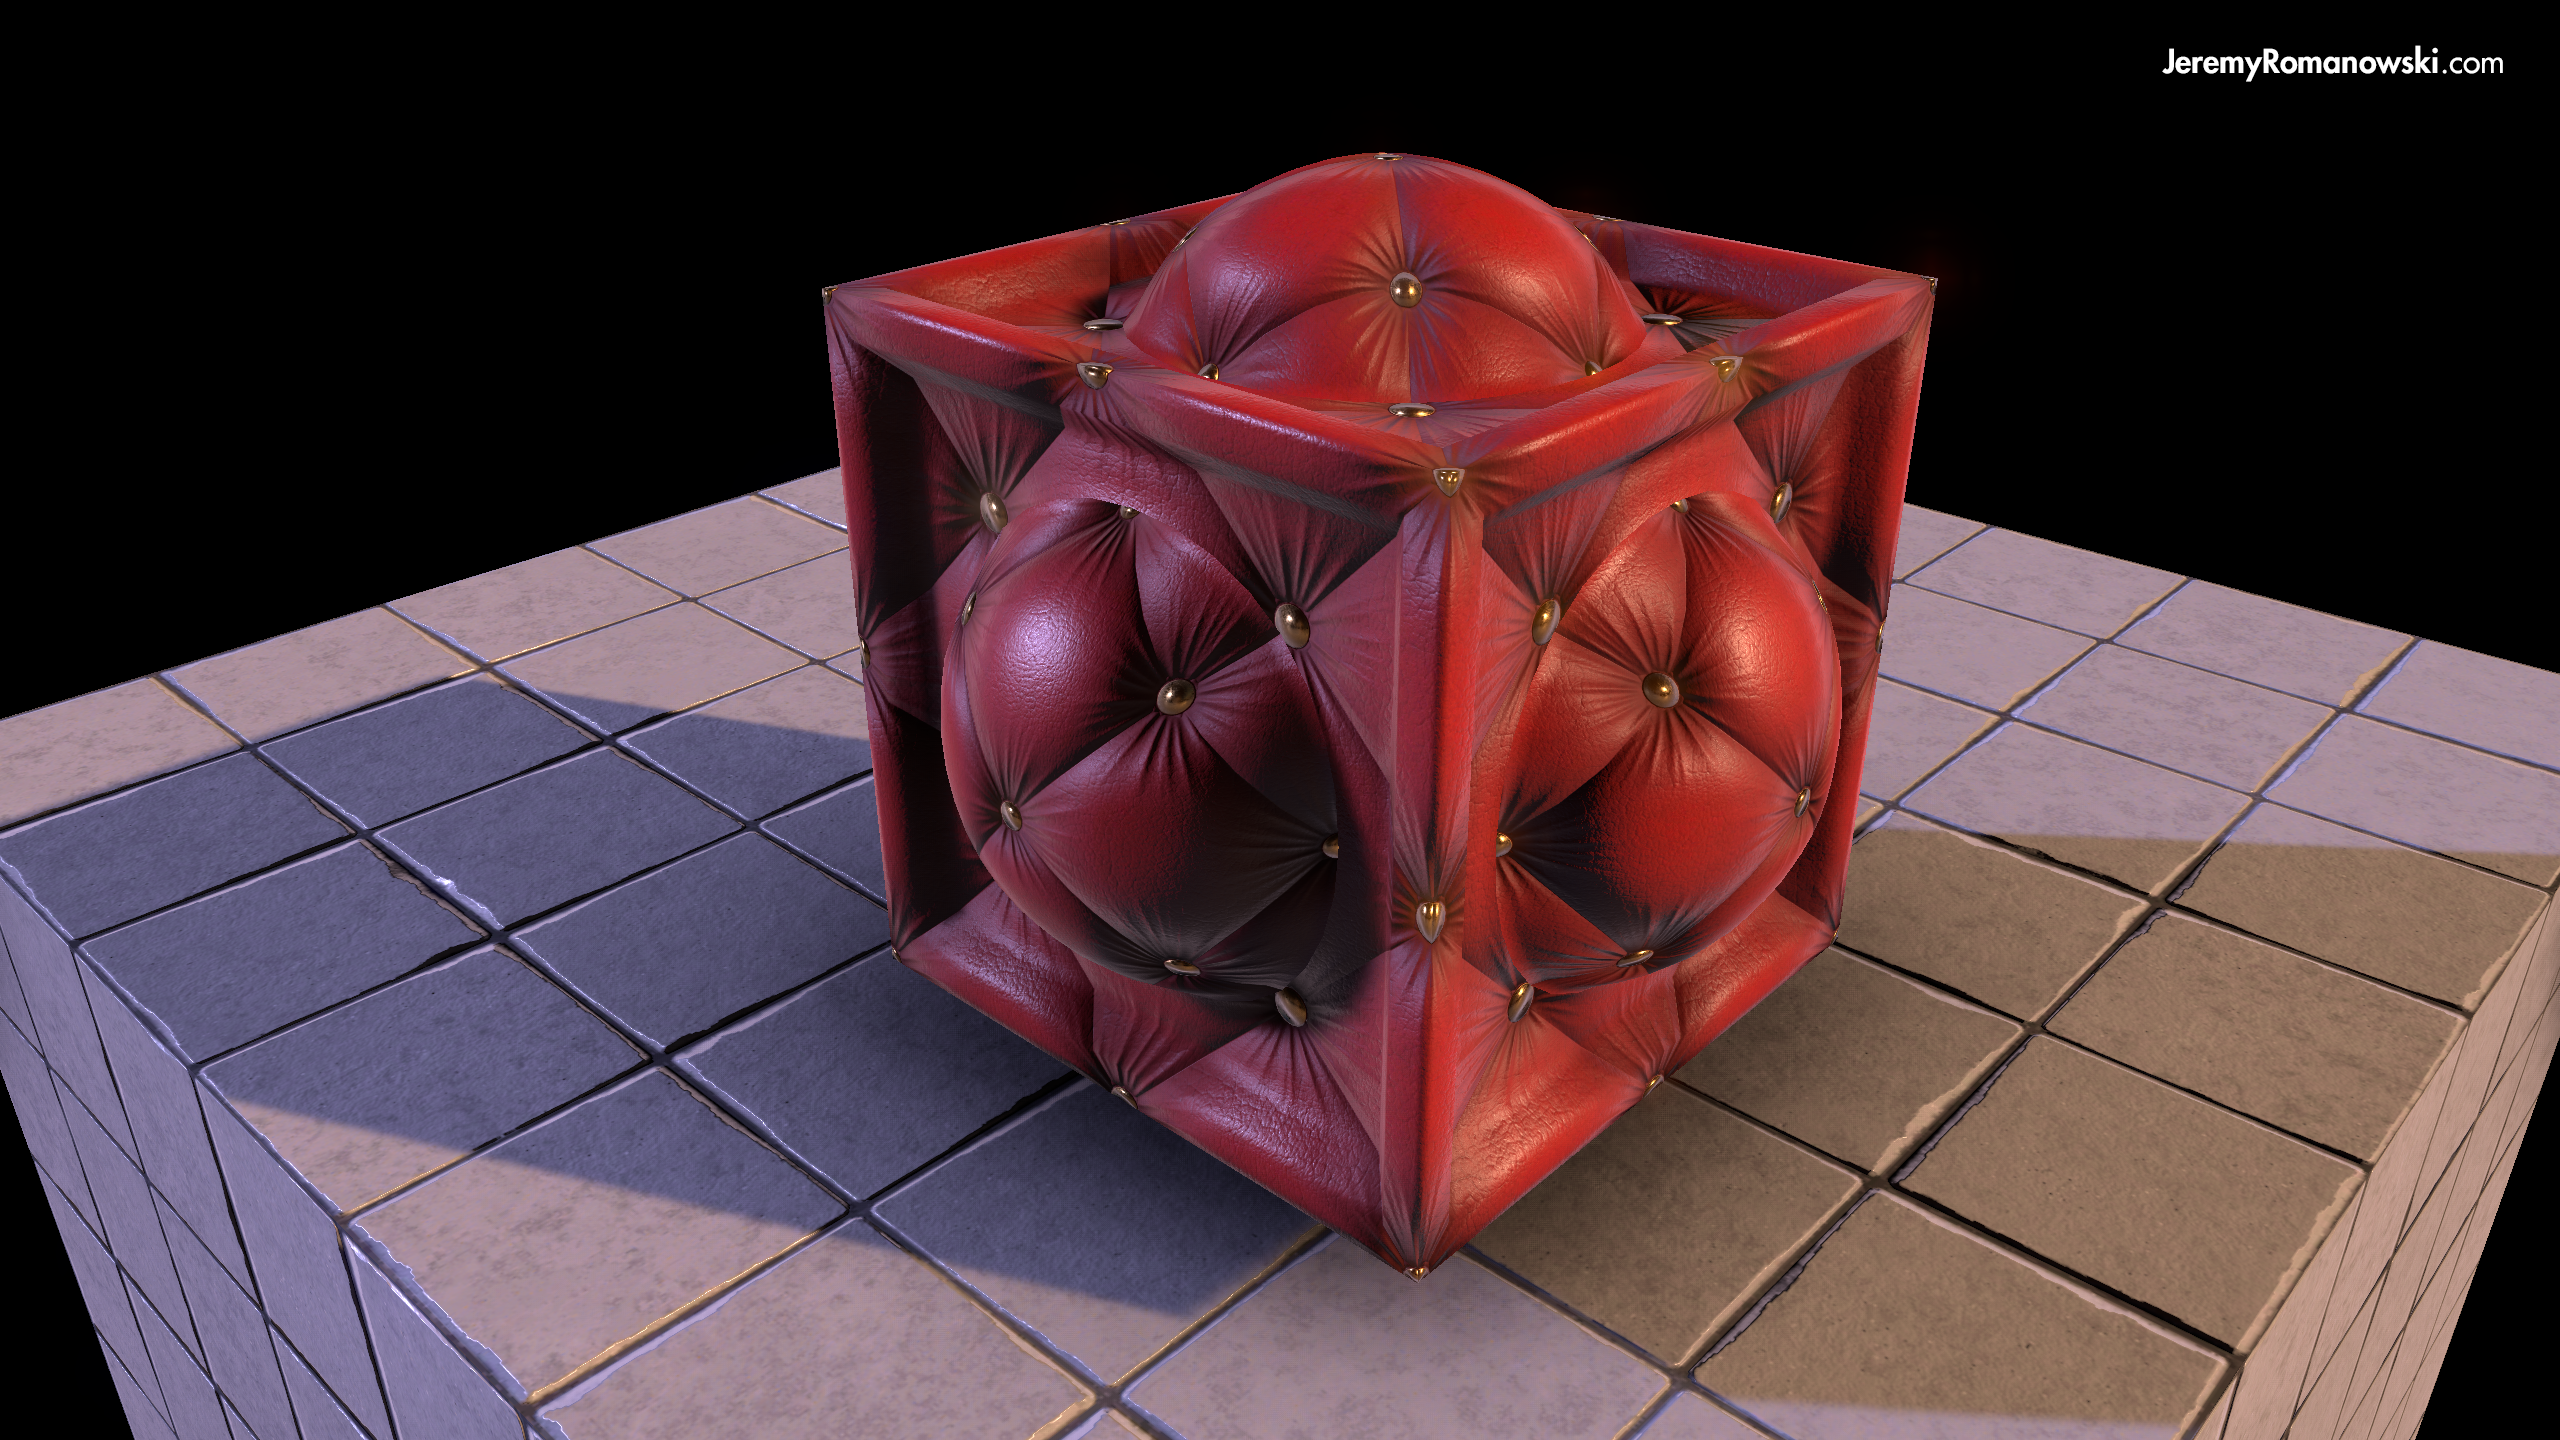
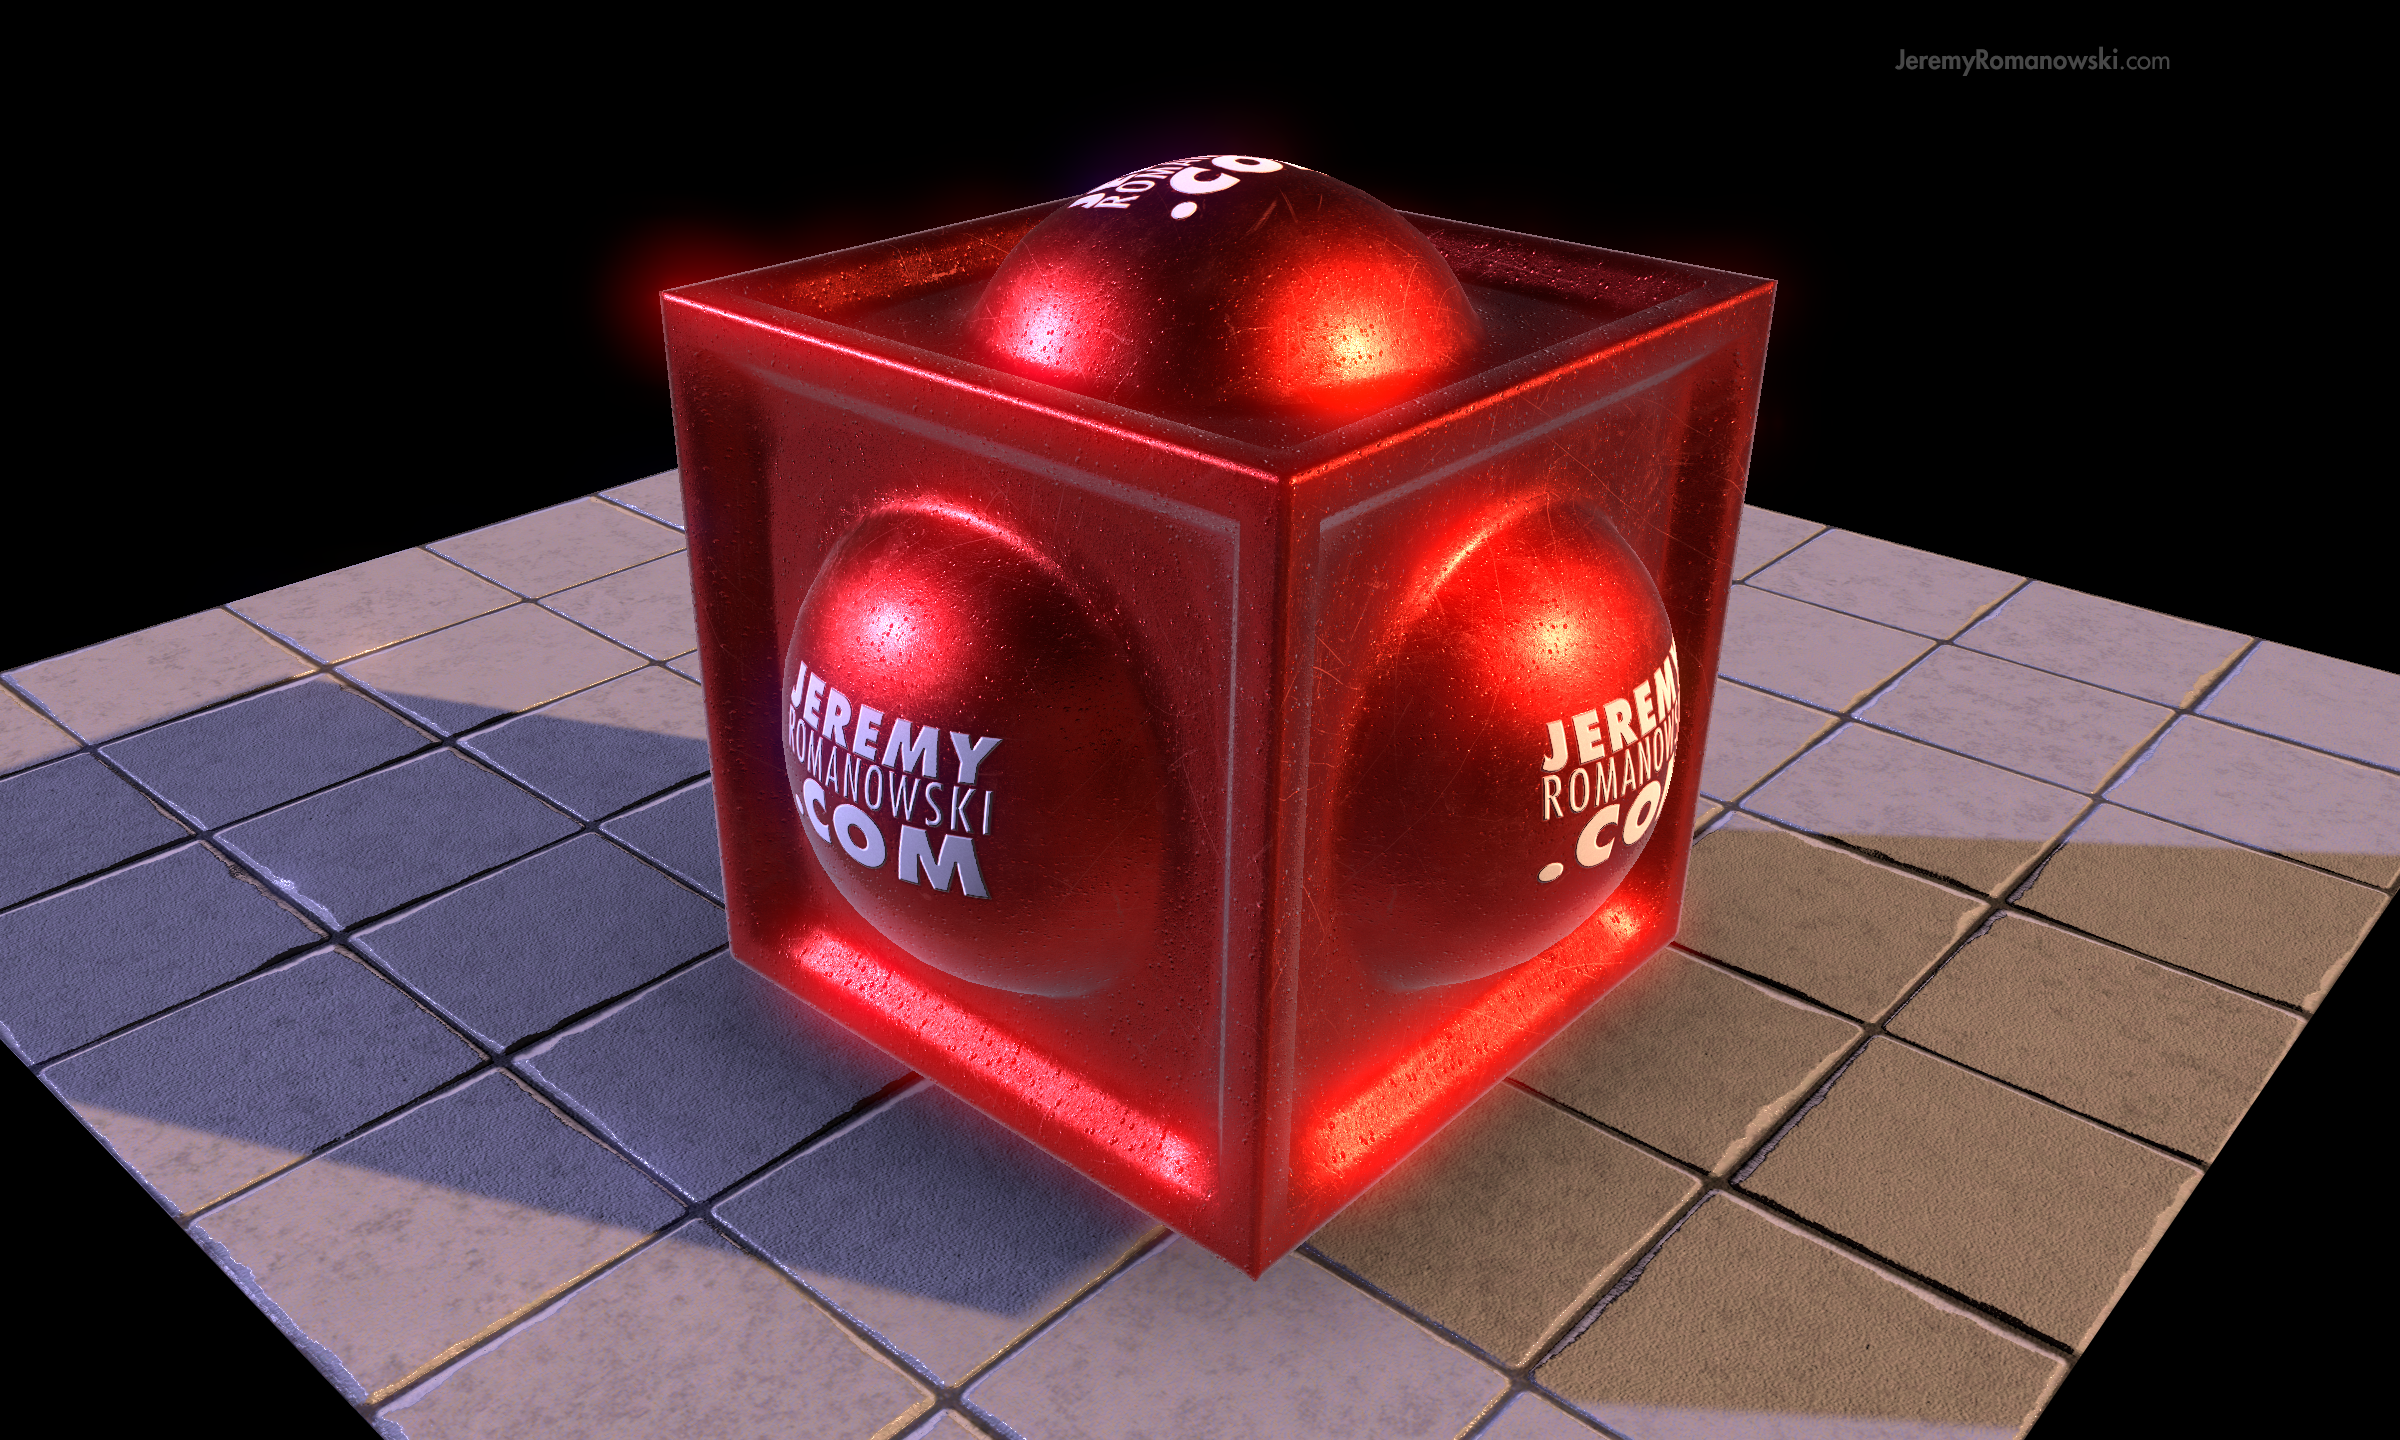
Metalness
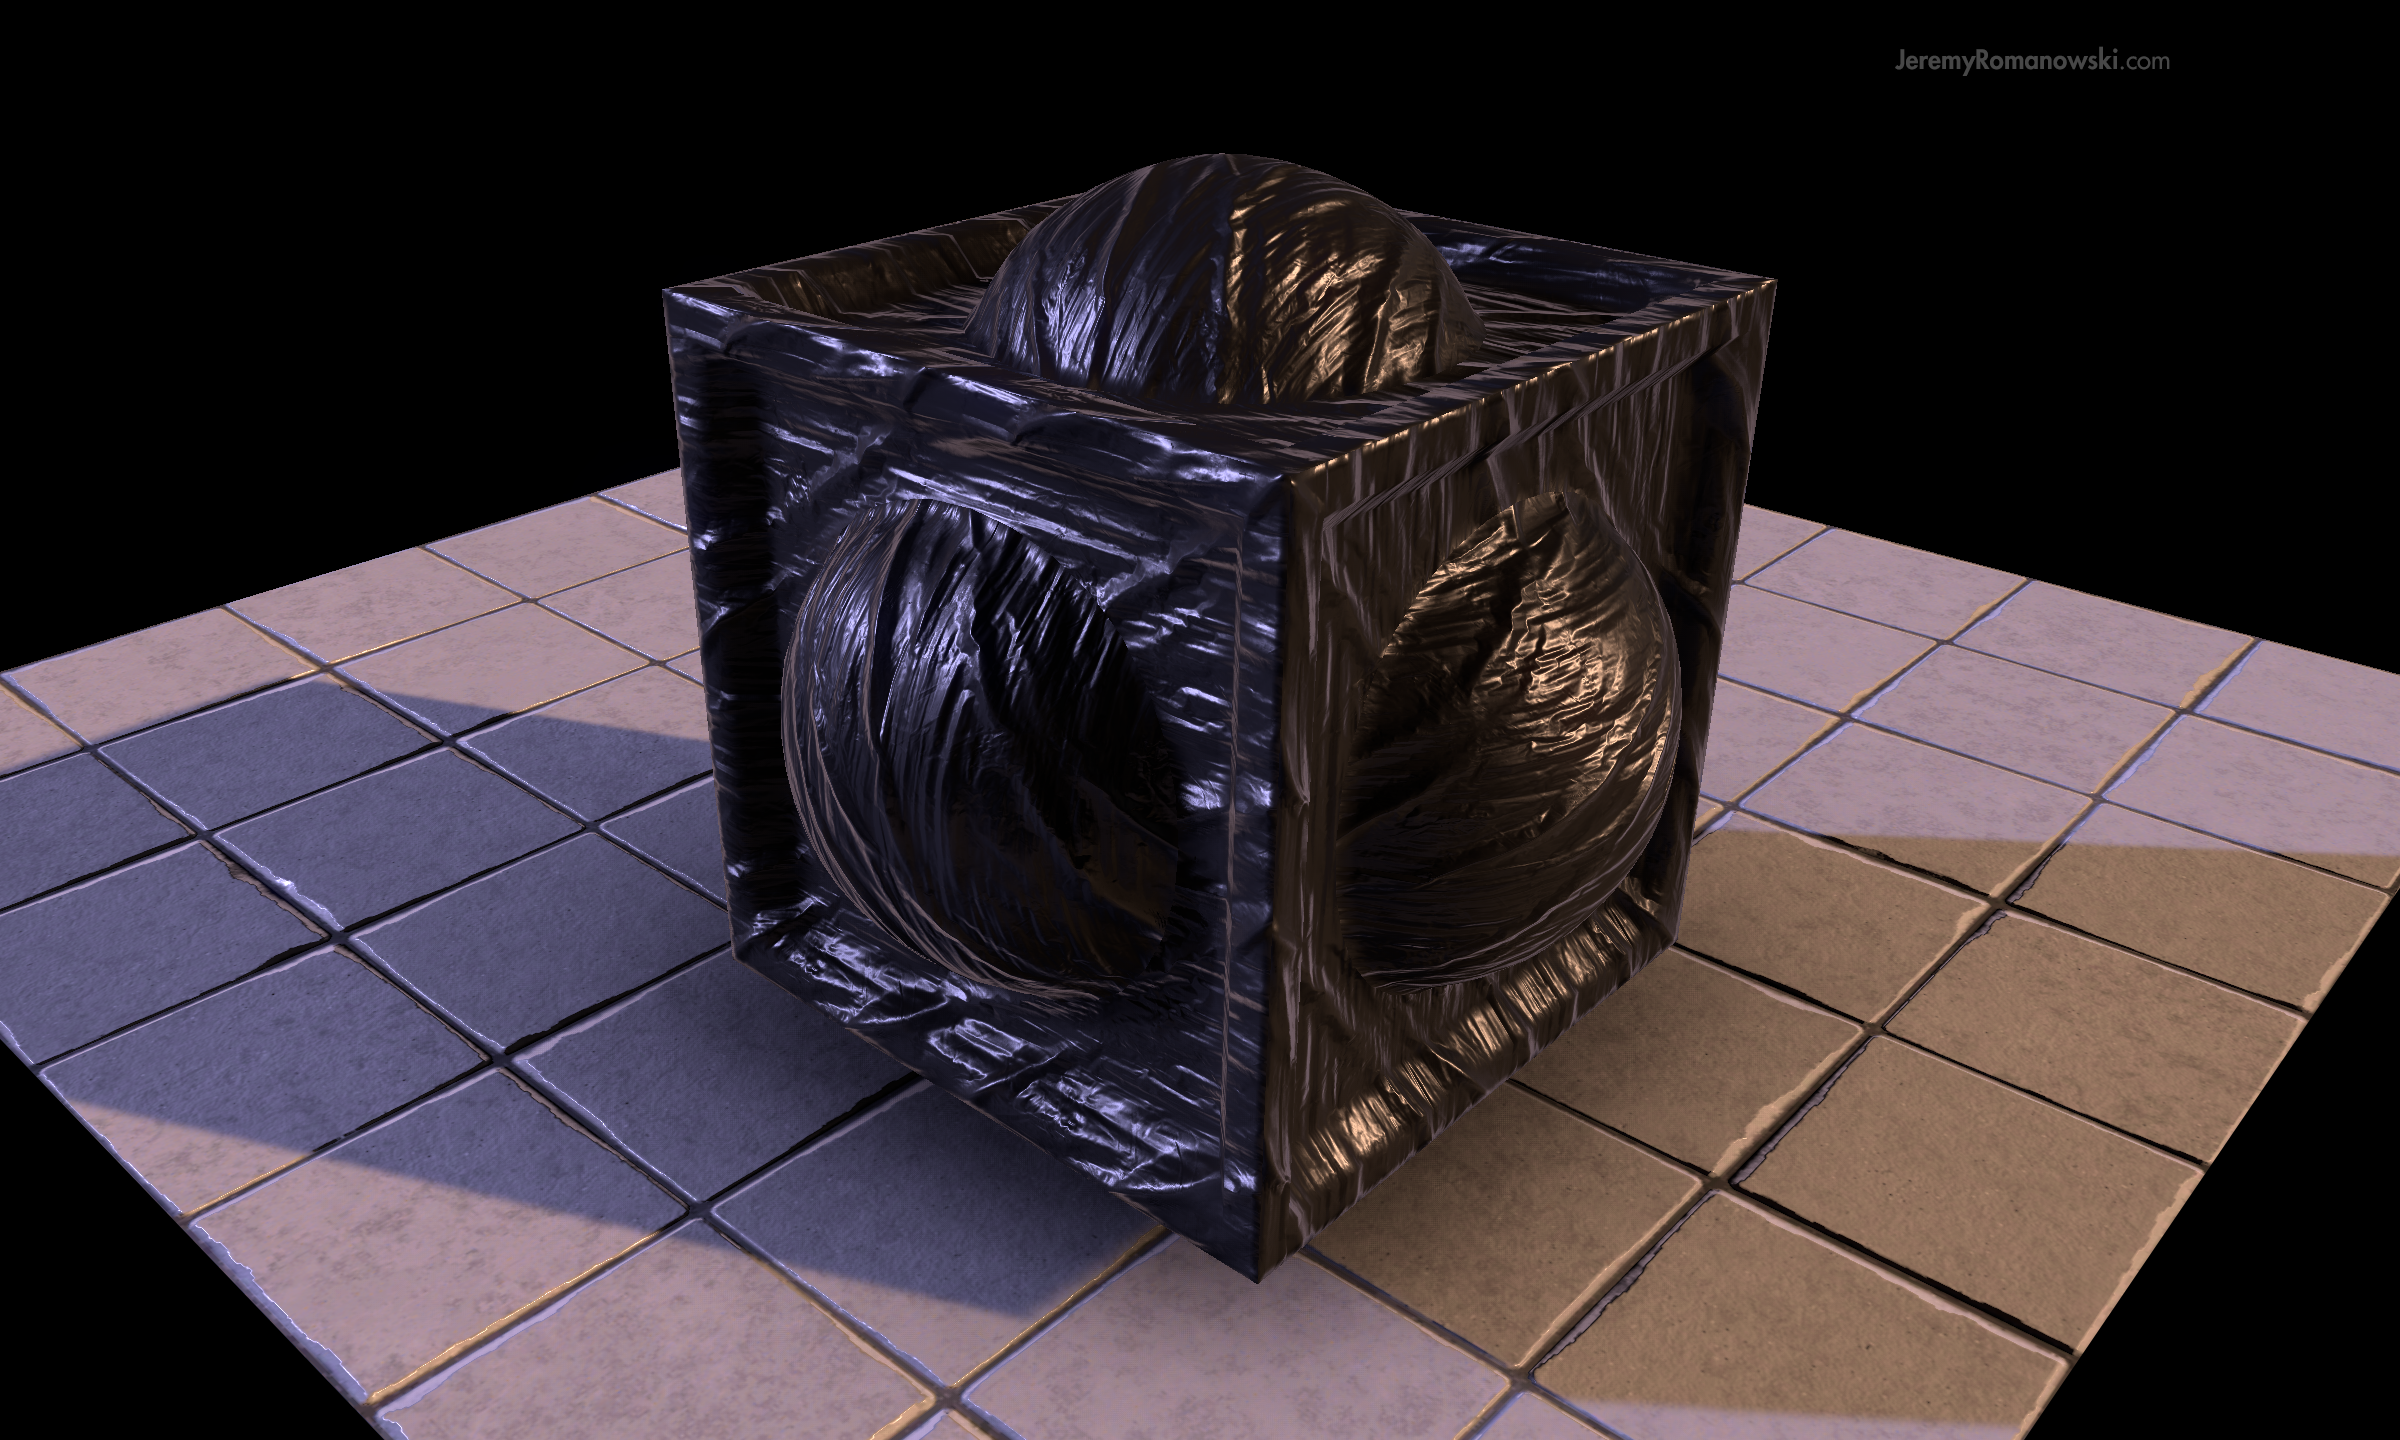
Metalness Map // CLICK FOR FULL SIZE
The Metalness Map serves to mask the areas of UV space which represent metallic surfaces (white) and everything else (black).
The Metalness Map, like the Smoothness Map and Ambient Occlusion Map, is stored in a single-channel (i.e. grayscale image). Leveraging this information allows us to create a composite texture, also known as a Pack Map, which contains all three maps in a single file. Efficiency!
In the case of Unity's Standard Shader, the Metalness values are stored in the Red Channel, while the Smoothness values are stored in the Alpha Channel, and Ambient Occlusion in the Green Channel. Well what about the Blue Channel? By default, Unity leaves the Blue Channel open for custom shader functions.
(We will take an in-depth look at the compositing process near the end of this article.)
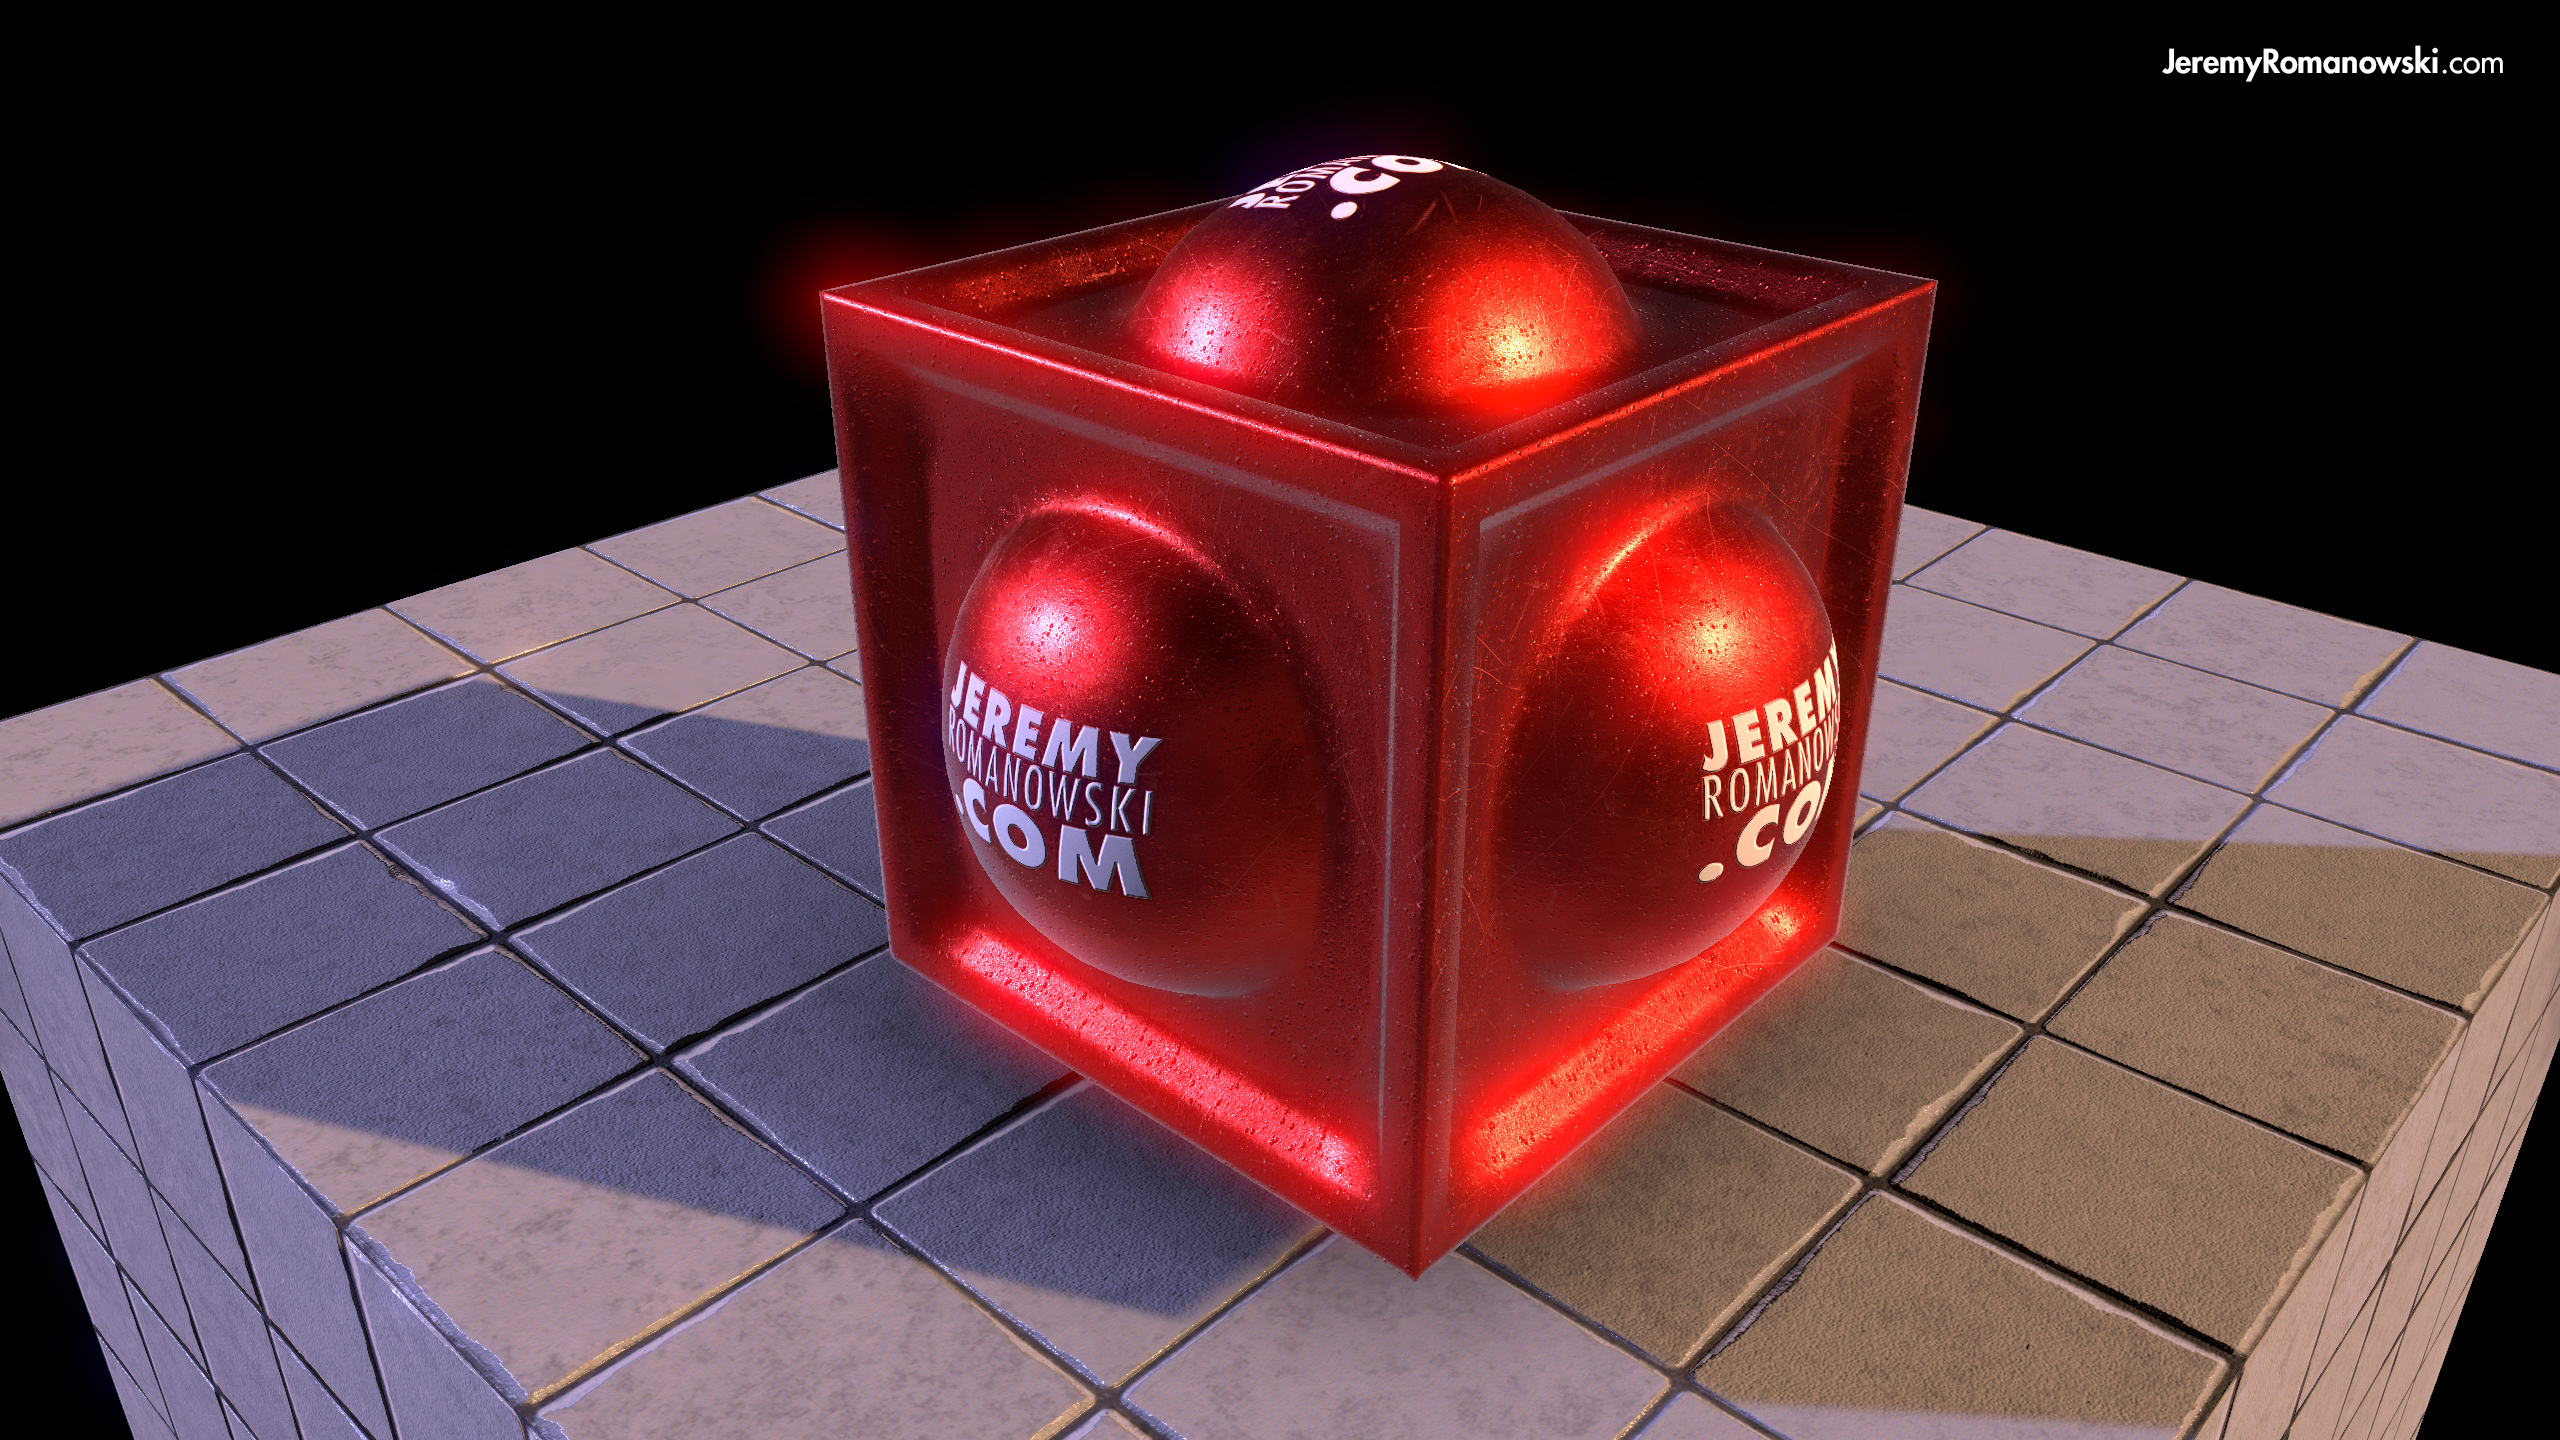
White Albedo // 50% Smoothness // Normal Map // Metalness Map // CLICK FOR FULL SIZE
“...you should always author your Metalness Map with a value of 0 or 255 - nothing in between!”
Authoring Metalness Maps
Since there are no known materials in the physical world which mimic the surface properties of both metals and non-metals, you should always author your metalness map with a value of 0 OR 255 - and nothing in between! Note: Metal surfaces covered in a thin film of dust/dirt are the exception to the rule.
One could certainly argue the fact digital artists aren’t constrained by reality, and thus should author Metalness Maps at our own discretion, but [generally speaking] a grayscale laden Metalness Map just doesn’t retain fidelity under scrutiny, nor does it take advantage of the shader's inherent behavior.
“With great power comes great responsibility. ”
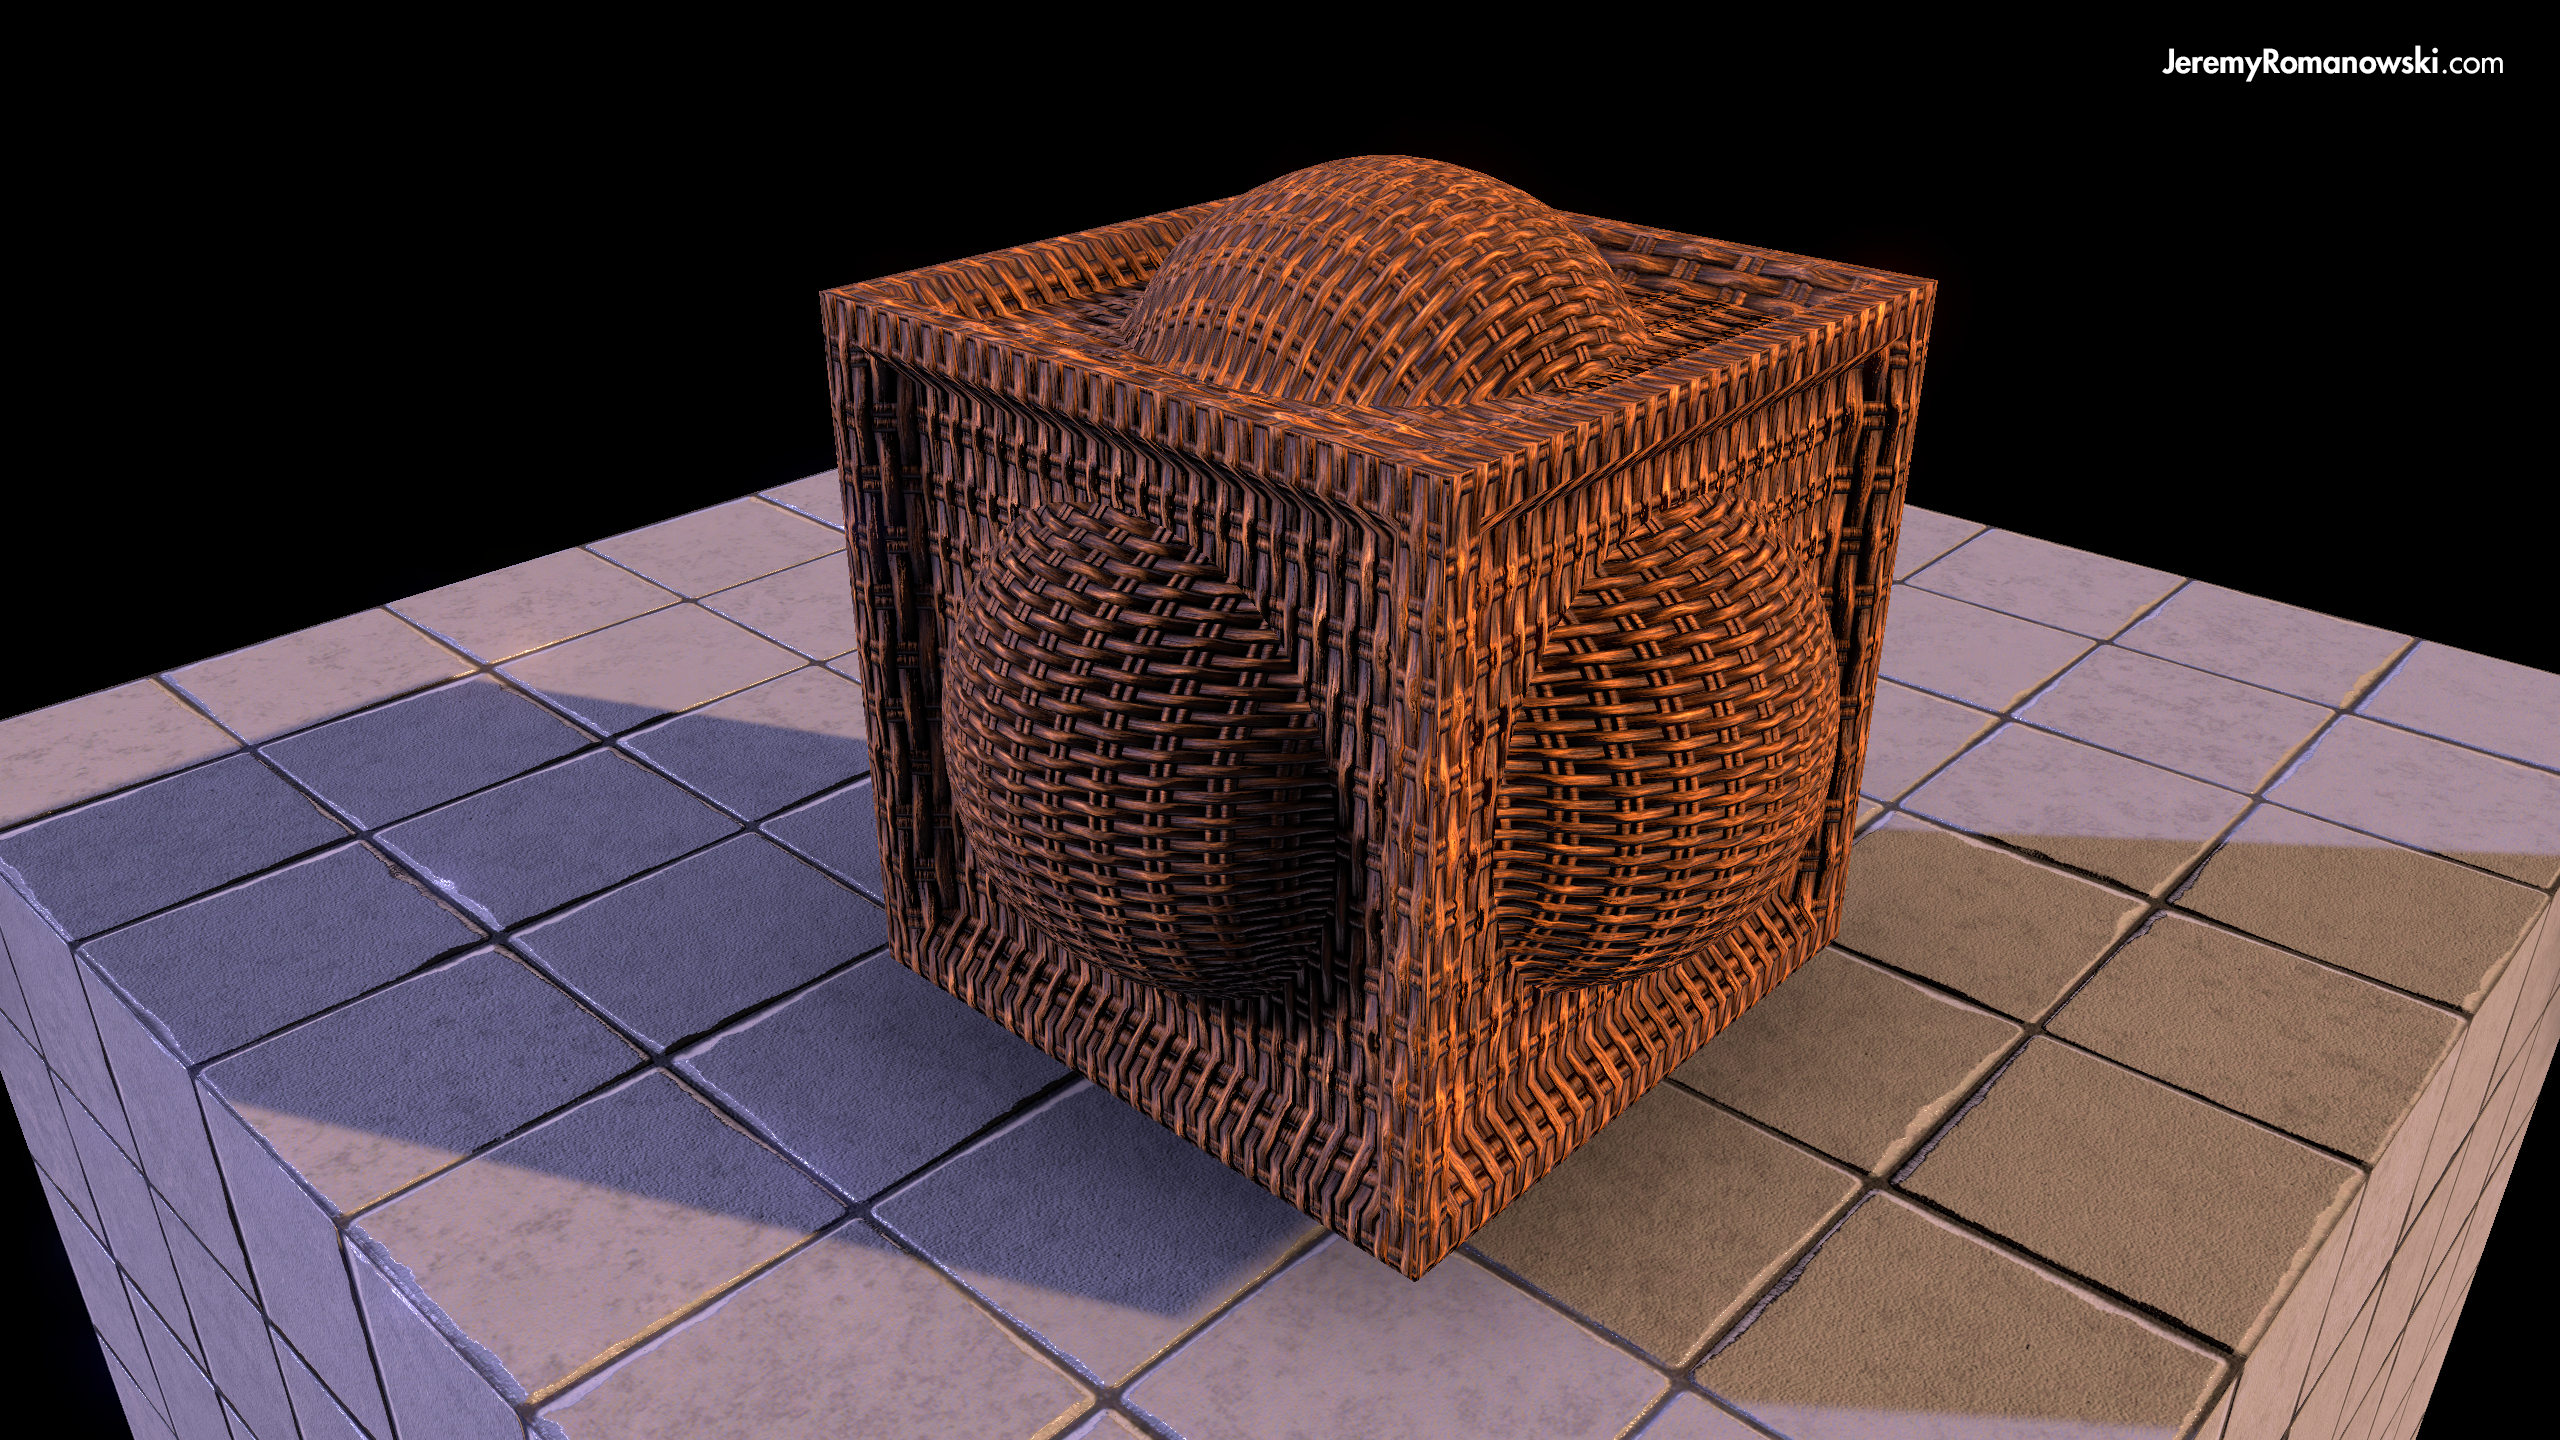
SMOOTHNESS
Smoothness Map // CLICK FOR FULL SIZE
Upon adopting a PBR pipeline it is often the Smoothness Map which gives artists a difficult time. But it is also the most enjoyable to author! Why is that?
Well for starters, the Smoothness Map has the great responsibility of approximating all the subtle, nuanced characteristics which light energy exhibits upon interacting with a (micro)surface. Whether it's as smooth as a cue ball or rough as chalk, it can be approximated with this single channel.
There are "countless" possibilities between the roughest surface (0) and the smoothest surface (255). Now obviously 256 degrees of interpolation is a far cry from being considered countless, but the spectrum of surface characteristics represented by each degree is substantial; so much so that deviations from physical reality can be realized at run time by the average pair of eyes. Ever thought a game looked like it was “dipped in vaseline”?
As rendering fidelity approaches physical-accuracy humans are increasingly sensitive to the (often small) disparities between what is and isn't consistent within a [virtual] environment. As members of the human race we have the remarkable ability to perceive and immediately identify visual novelties, regardless of art style or fidelity goals. (e.g. photo-realism vs. stylized)


“Our sensitivity to novelty is born from repeated exposure to what was [at one point or another] also novel. We can then assume immersion is a product of consistency. ”
A SLIPPERY SLOPE
Our sensitivity to novelty is born from repeated exposure to what was [at one point or another] also novel. We can then assume immersion is a product of consistency.
Similar in nature to Texel Density, Smoothness values rely upon calculated consistency from all contributing artists. Whether you're an indie developer or a AAA studio, teams of all sizes would greatly benefit from a Smoothness Calibration Chart for the referencing of common project materials (e.g. plastic, wood, skin).
Of course, you can choose to author a rubber tire with a smoothness value of 100% (which who knows, might be the perfect look for your kart-racing game) but you should plan on maintaining that smoothness value across all rubber surfaces, or your project may run the risk of contracting a case of appending disbelief.

Unity 5 Calibration Scene
The Unity 5 Calibration Scene
When it comes to authoring the Smoothness Map, you'll want to make sure you have a "Calibration Scene" running in Unity to test your maps against varying lighting conditions. Unity generously released a "Calibration Scene" Asset Package for this very purpose, Available for Free Download on the Asset Store.
HIPPIE PRO-TIP
Before you even begin authoring the Smoothness Map, stop and take a moment to think... Try to mentally simulate how that surface feels to touch in the physical world, and then try to replicate that visual-tactile sensation on the screen. Trial and error is no doubt part of the PBR learning curve, but I find this visualization process to be helpful if (and when) uncertainties arise.
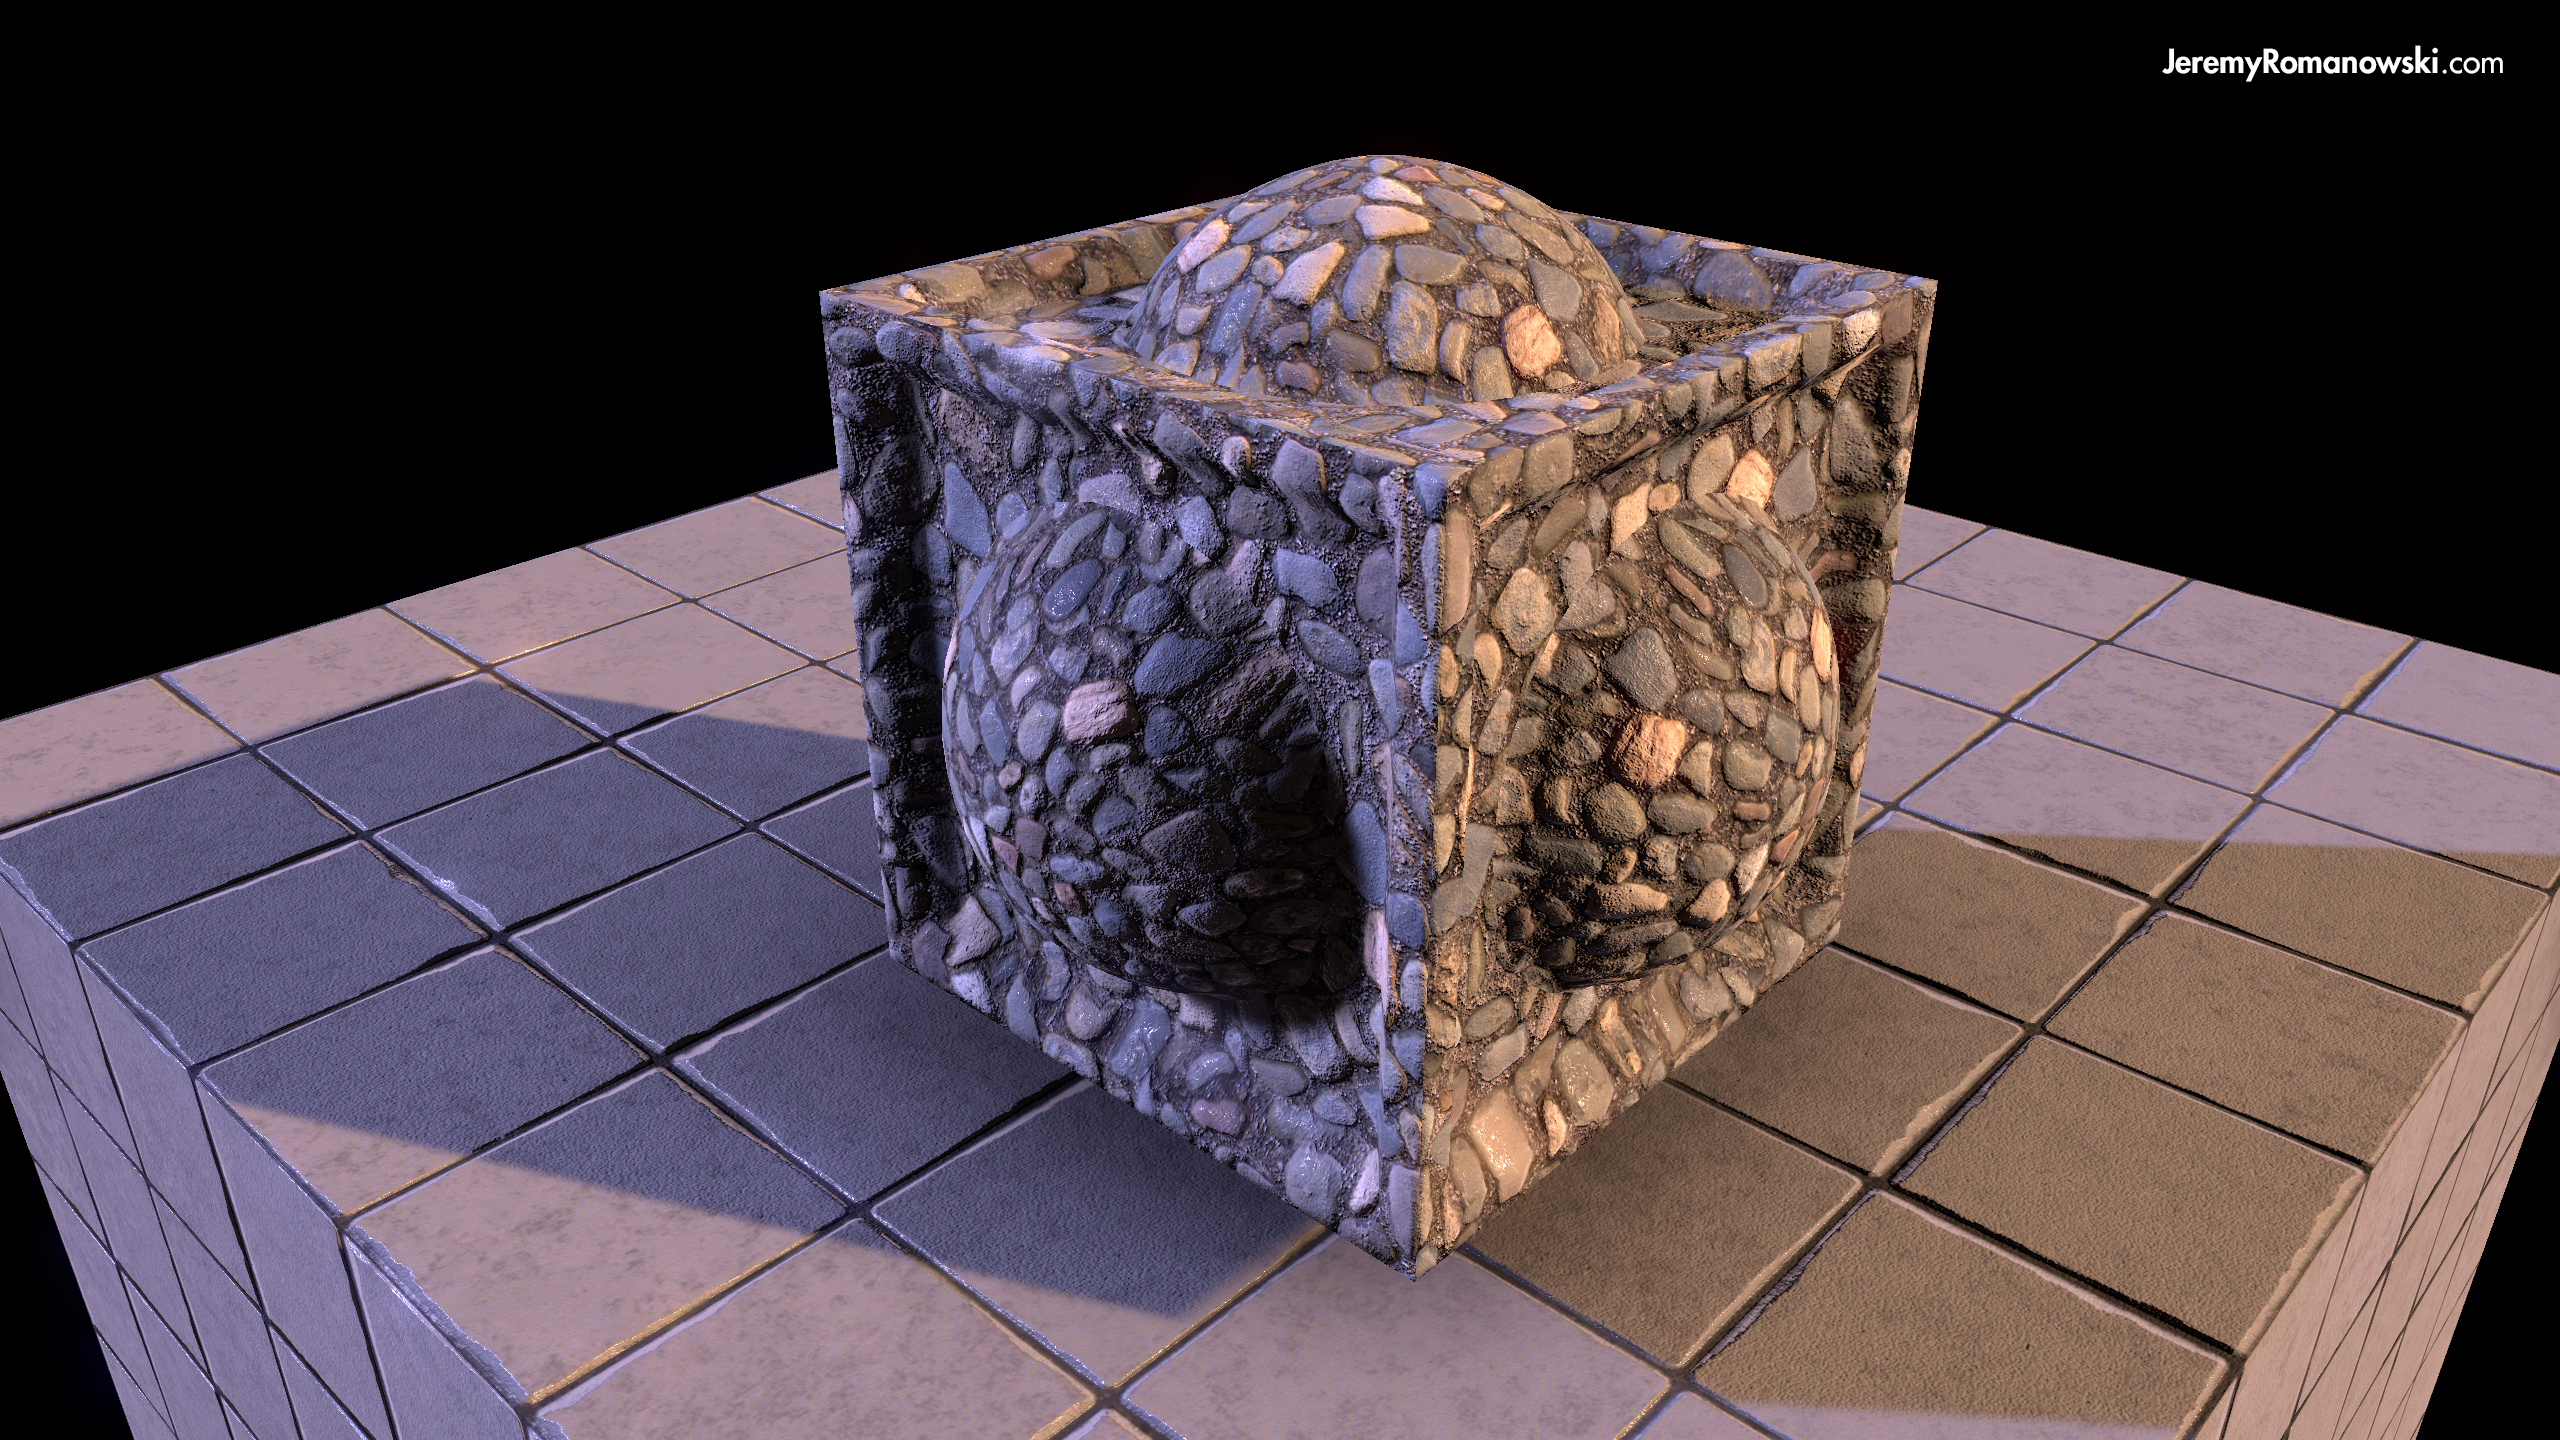
Occlusion
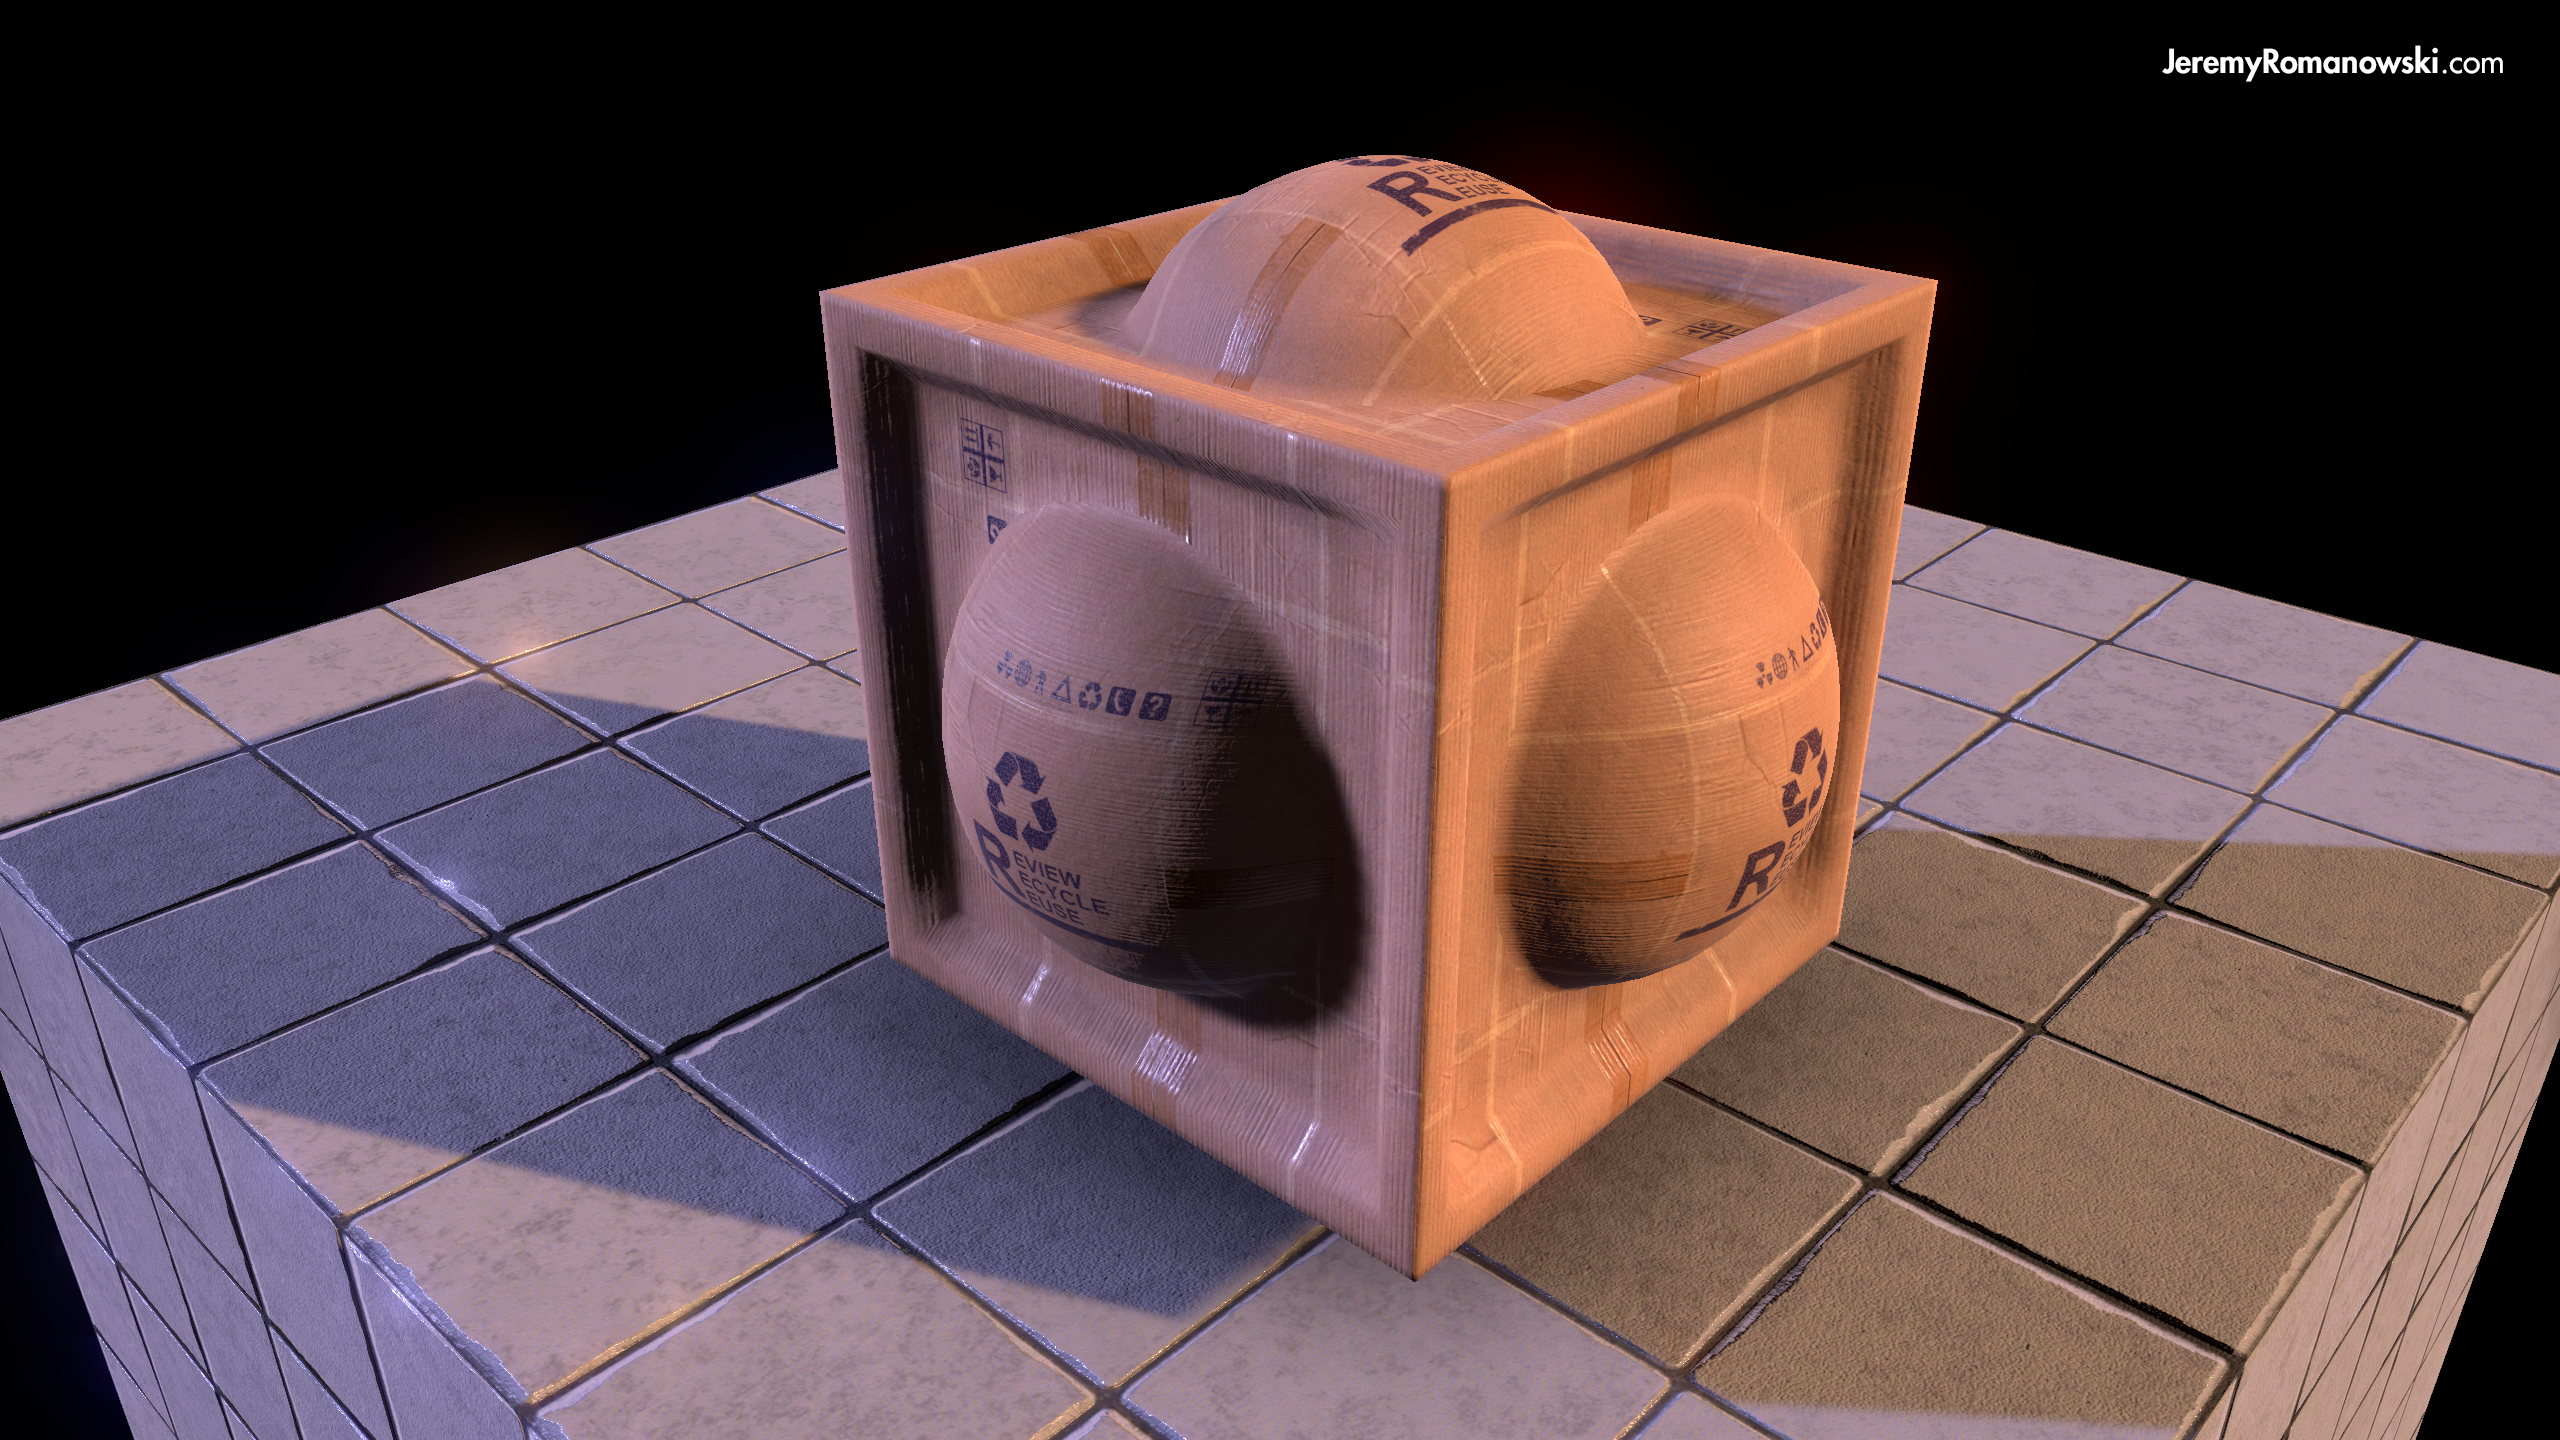
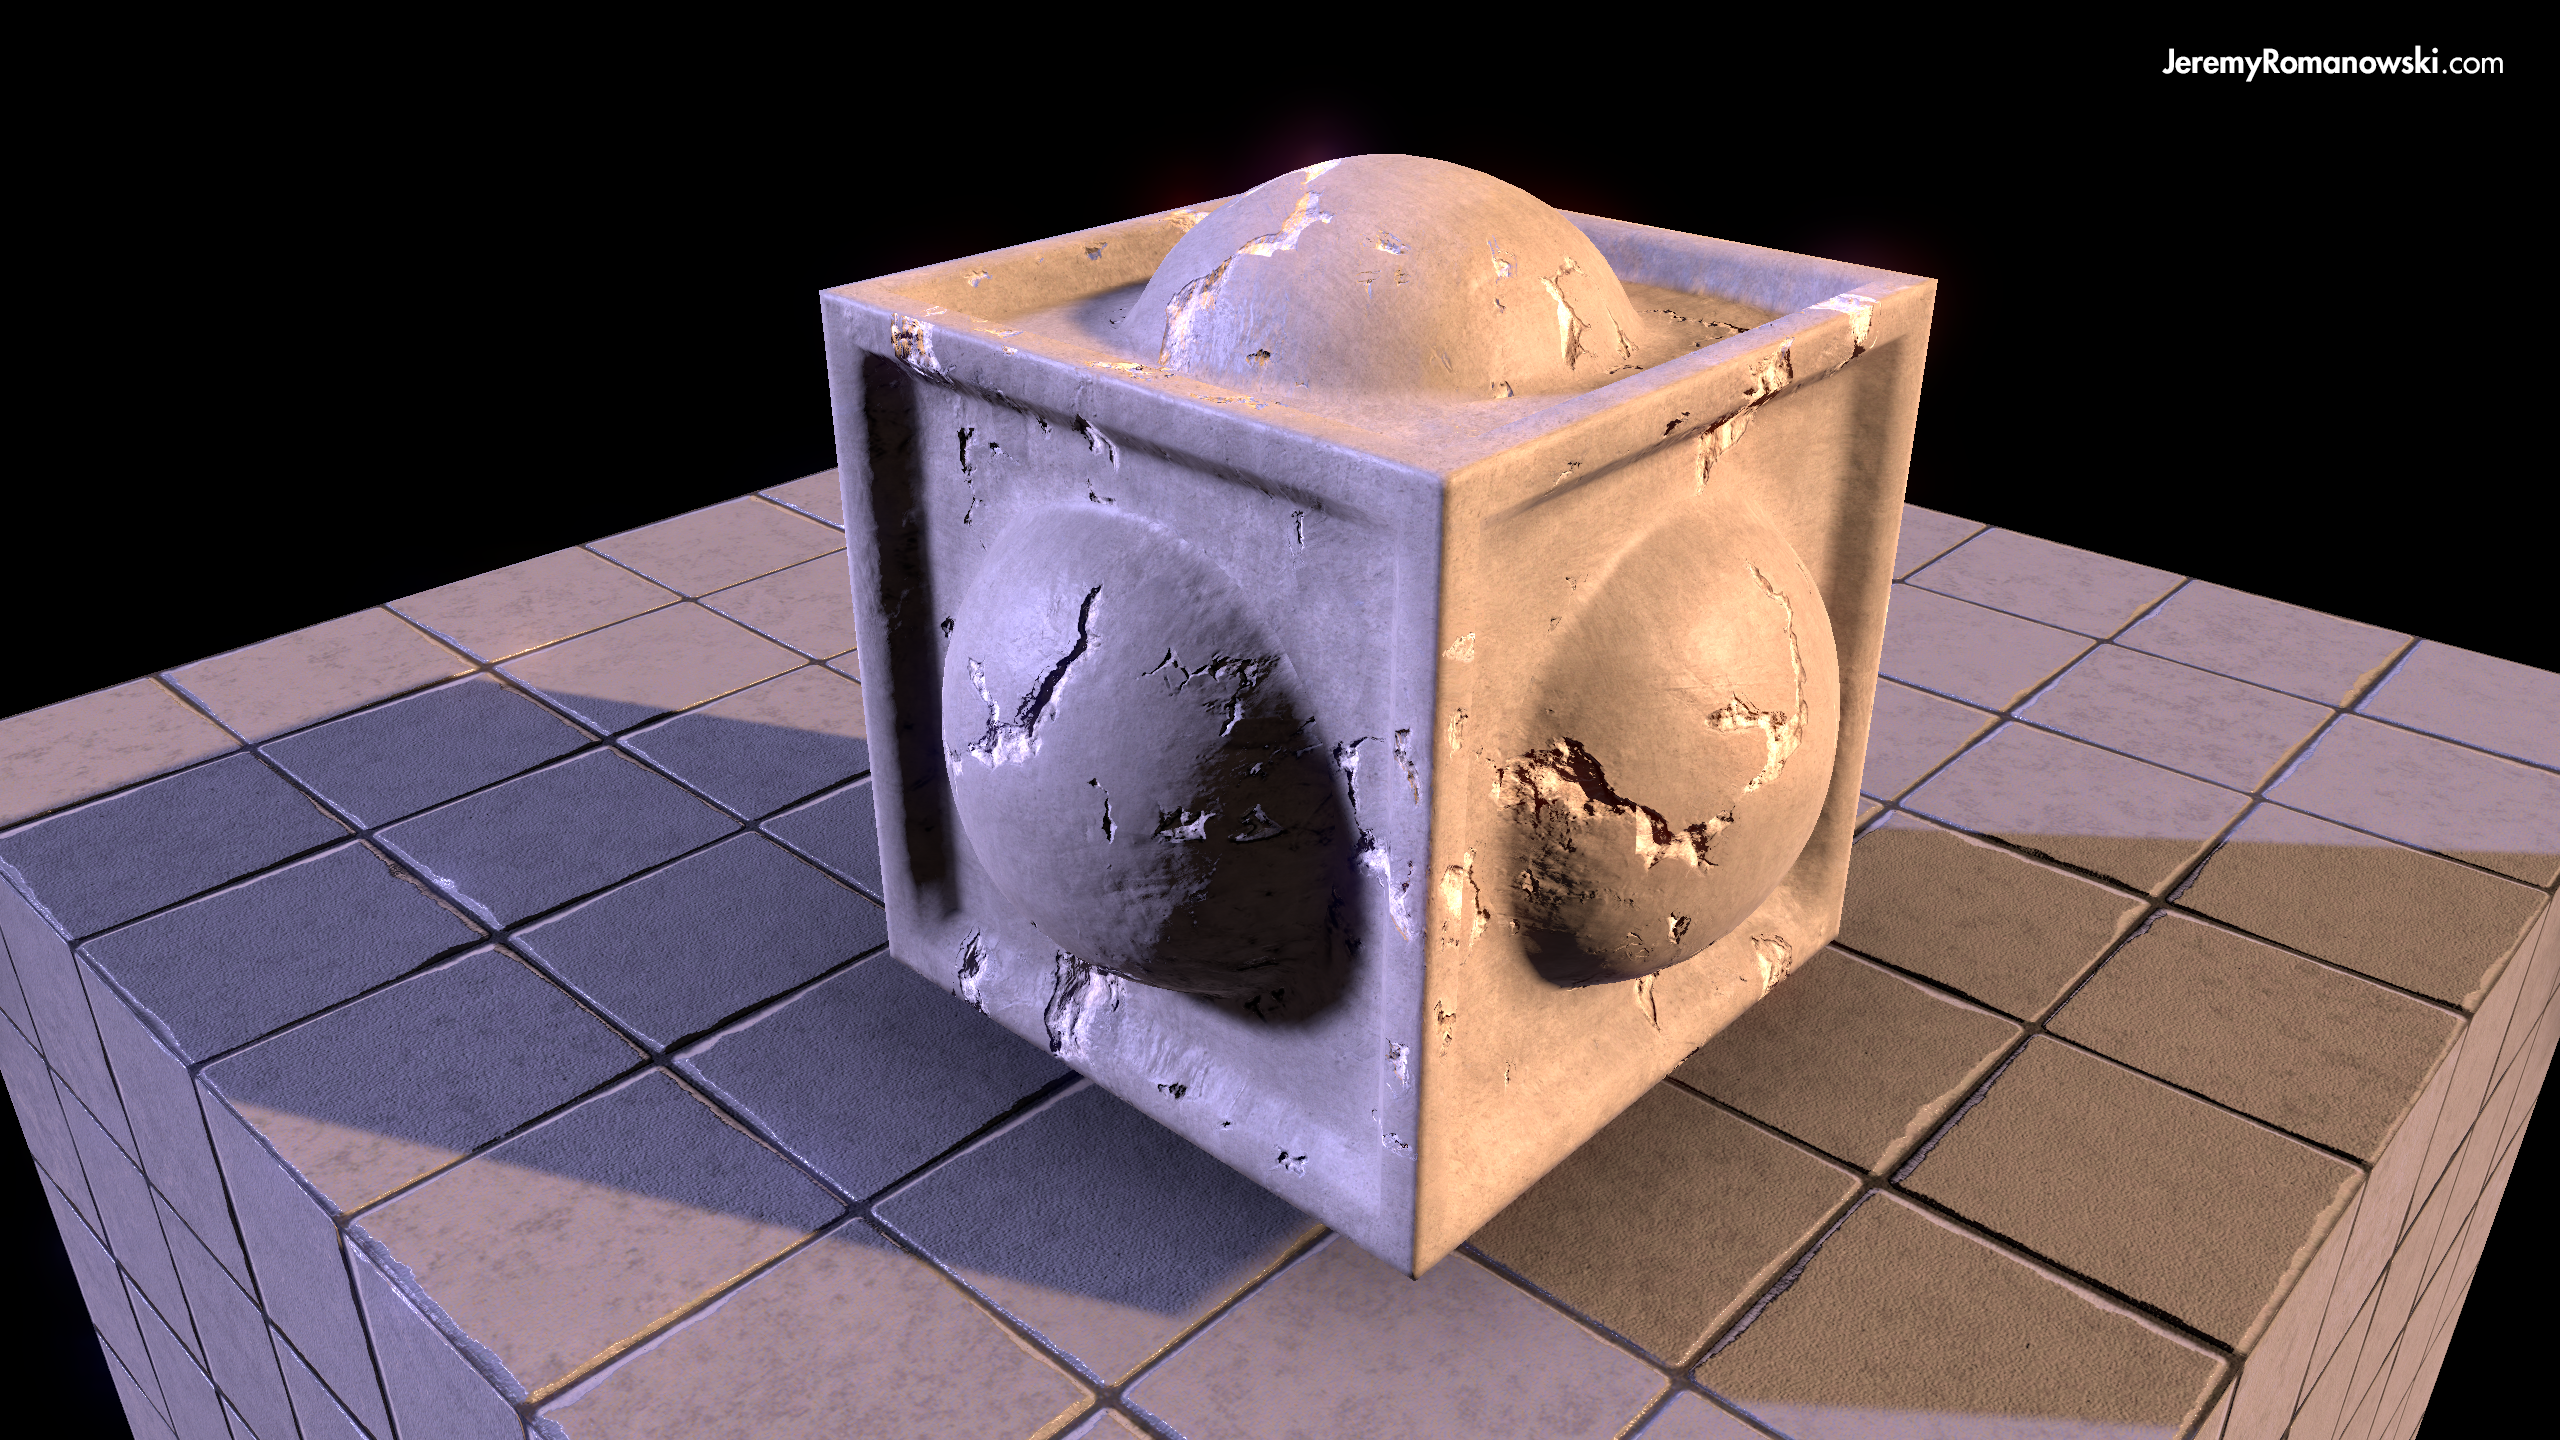
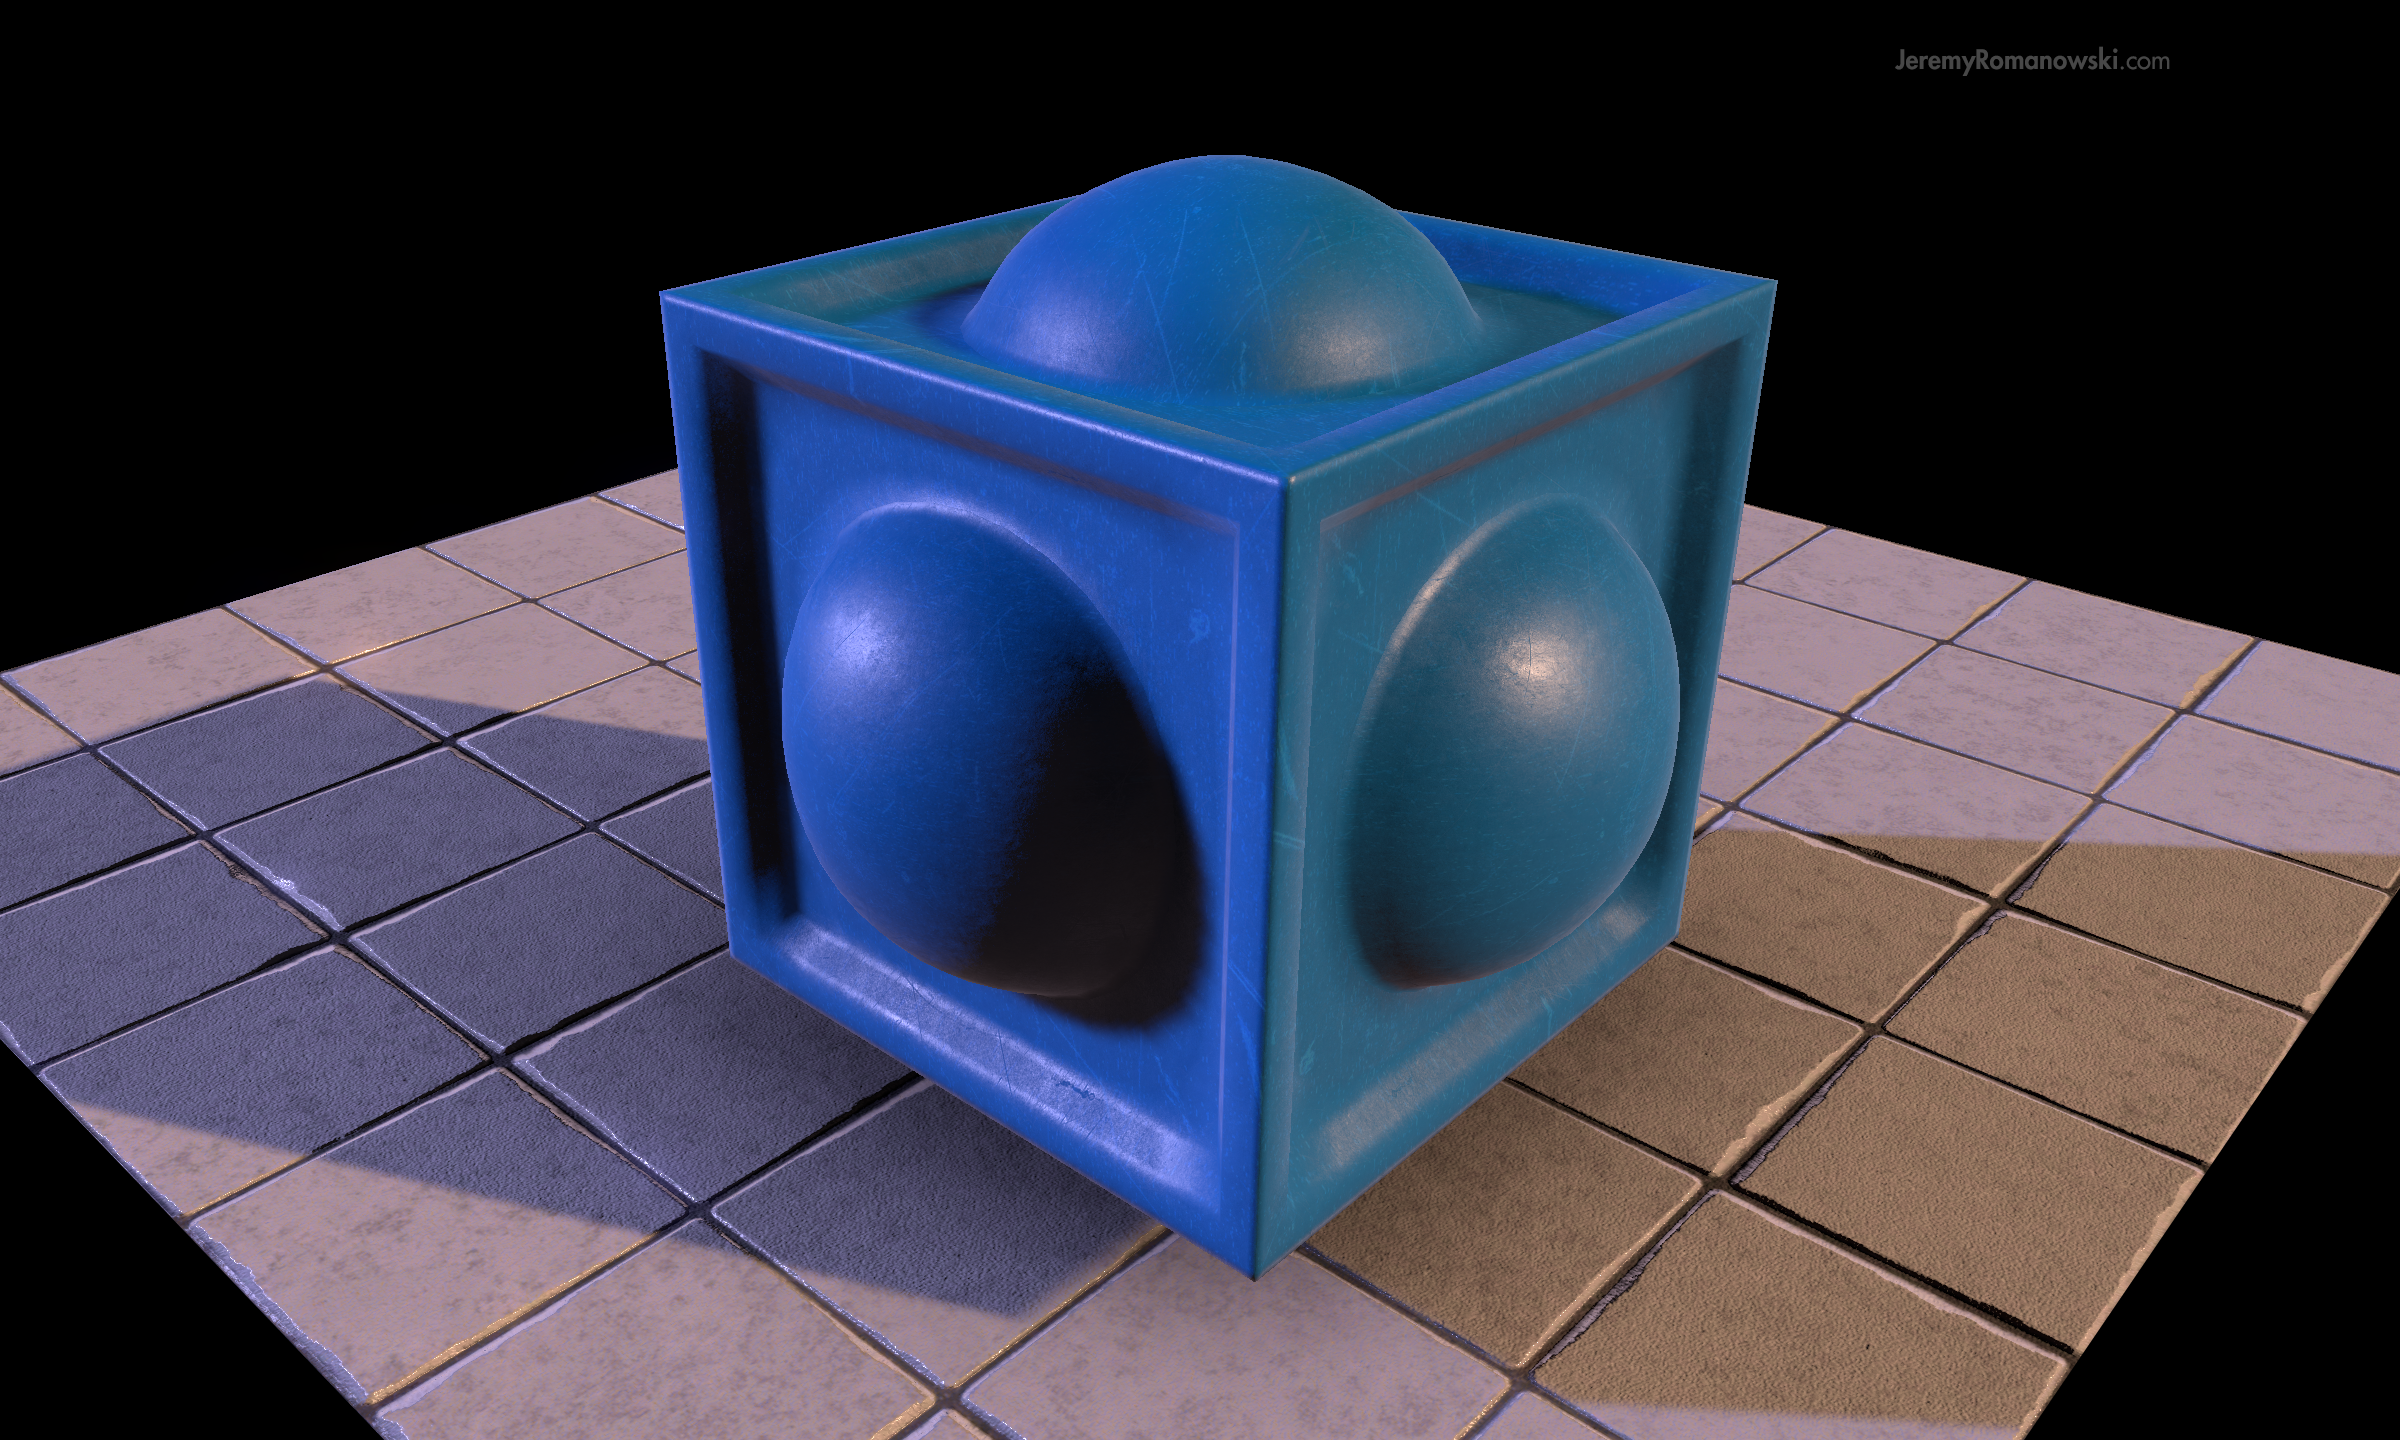
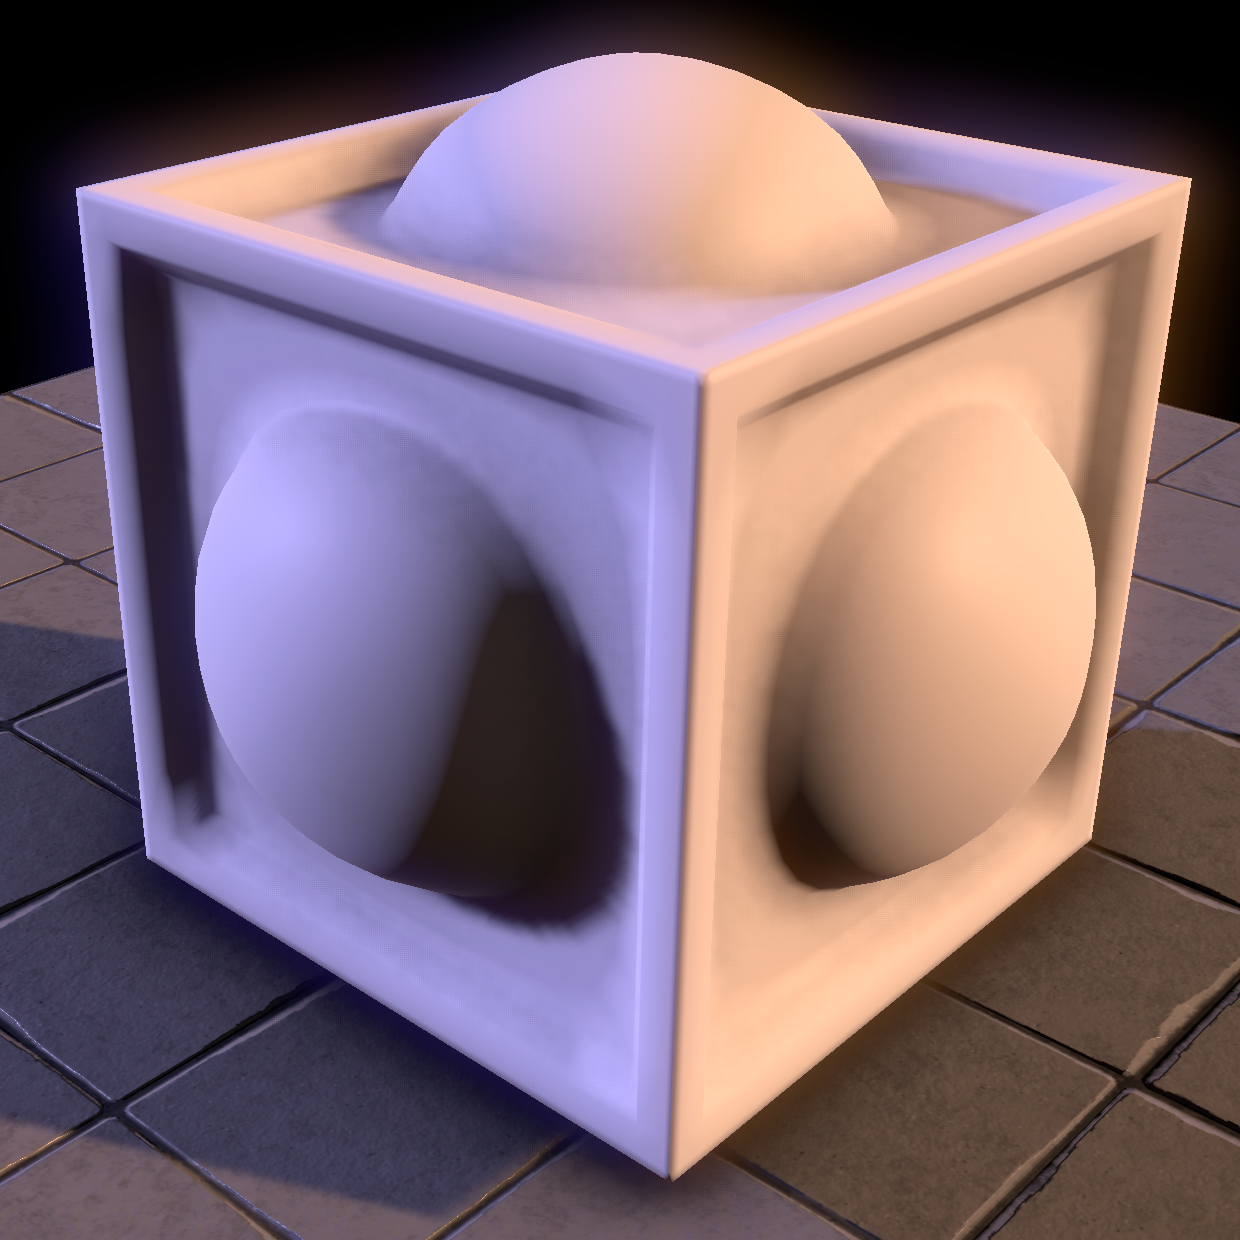
Correct AO Map // CLICK FOR FULL SIZE
To fully appreciate the role of the Occlusion Map we'll be removing the (secondary) fill light to reveal the indirectly illuminated surface (on the right side of the cube). We must do this because the Occlusion Map's behavior is only visible when the intensity of indirect illumination exceeds that of direct illumination. (i.e. The surface is in shadow, to some degree.)
(Note: Indirect lighting data comes from reflections and Global Illumination, baked or realtime.)

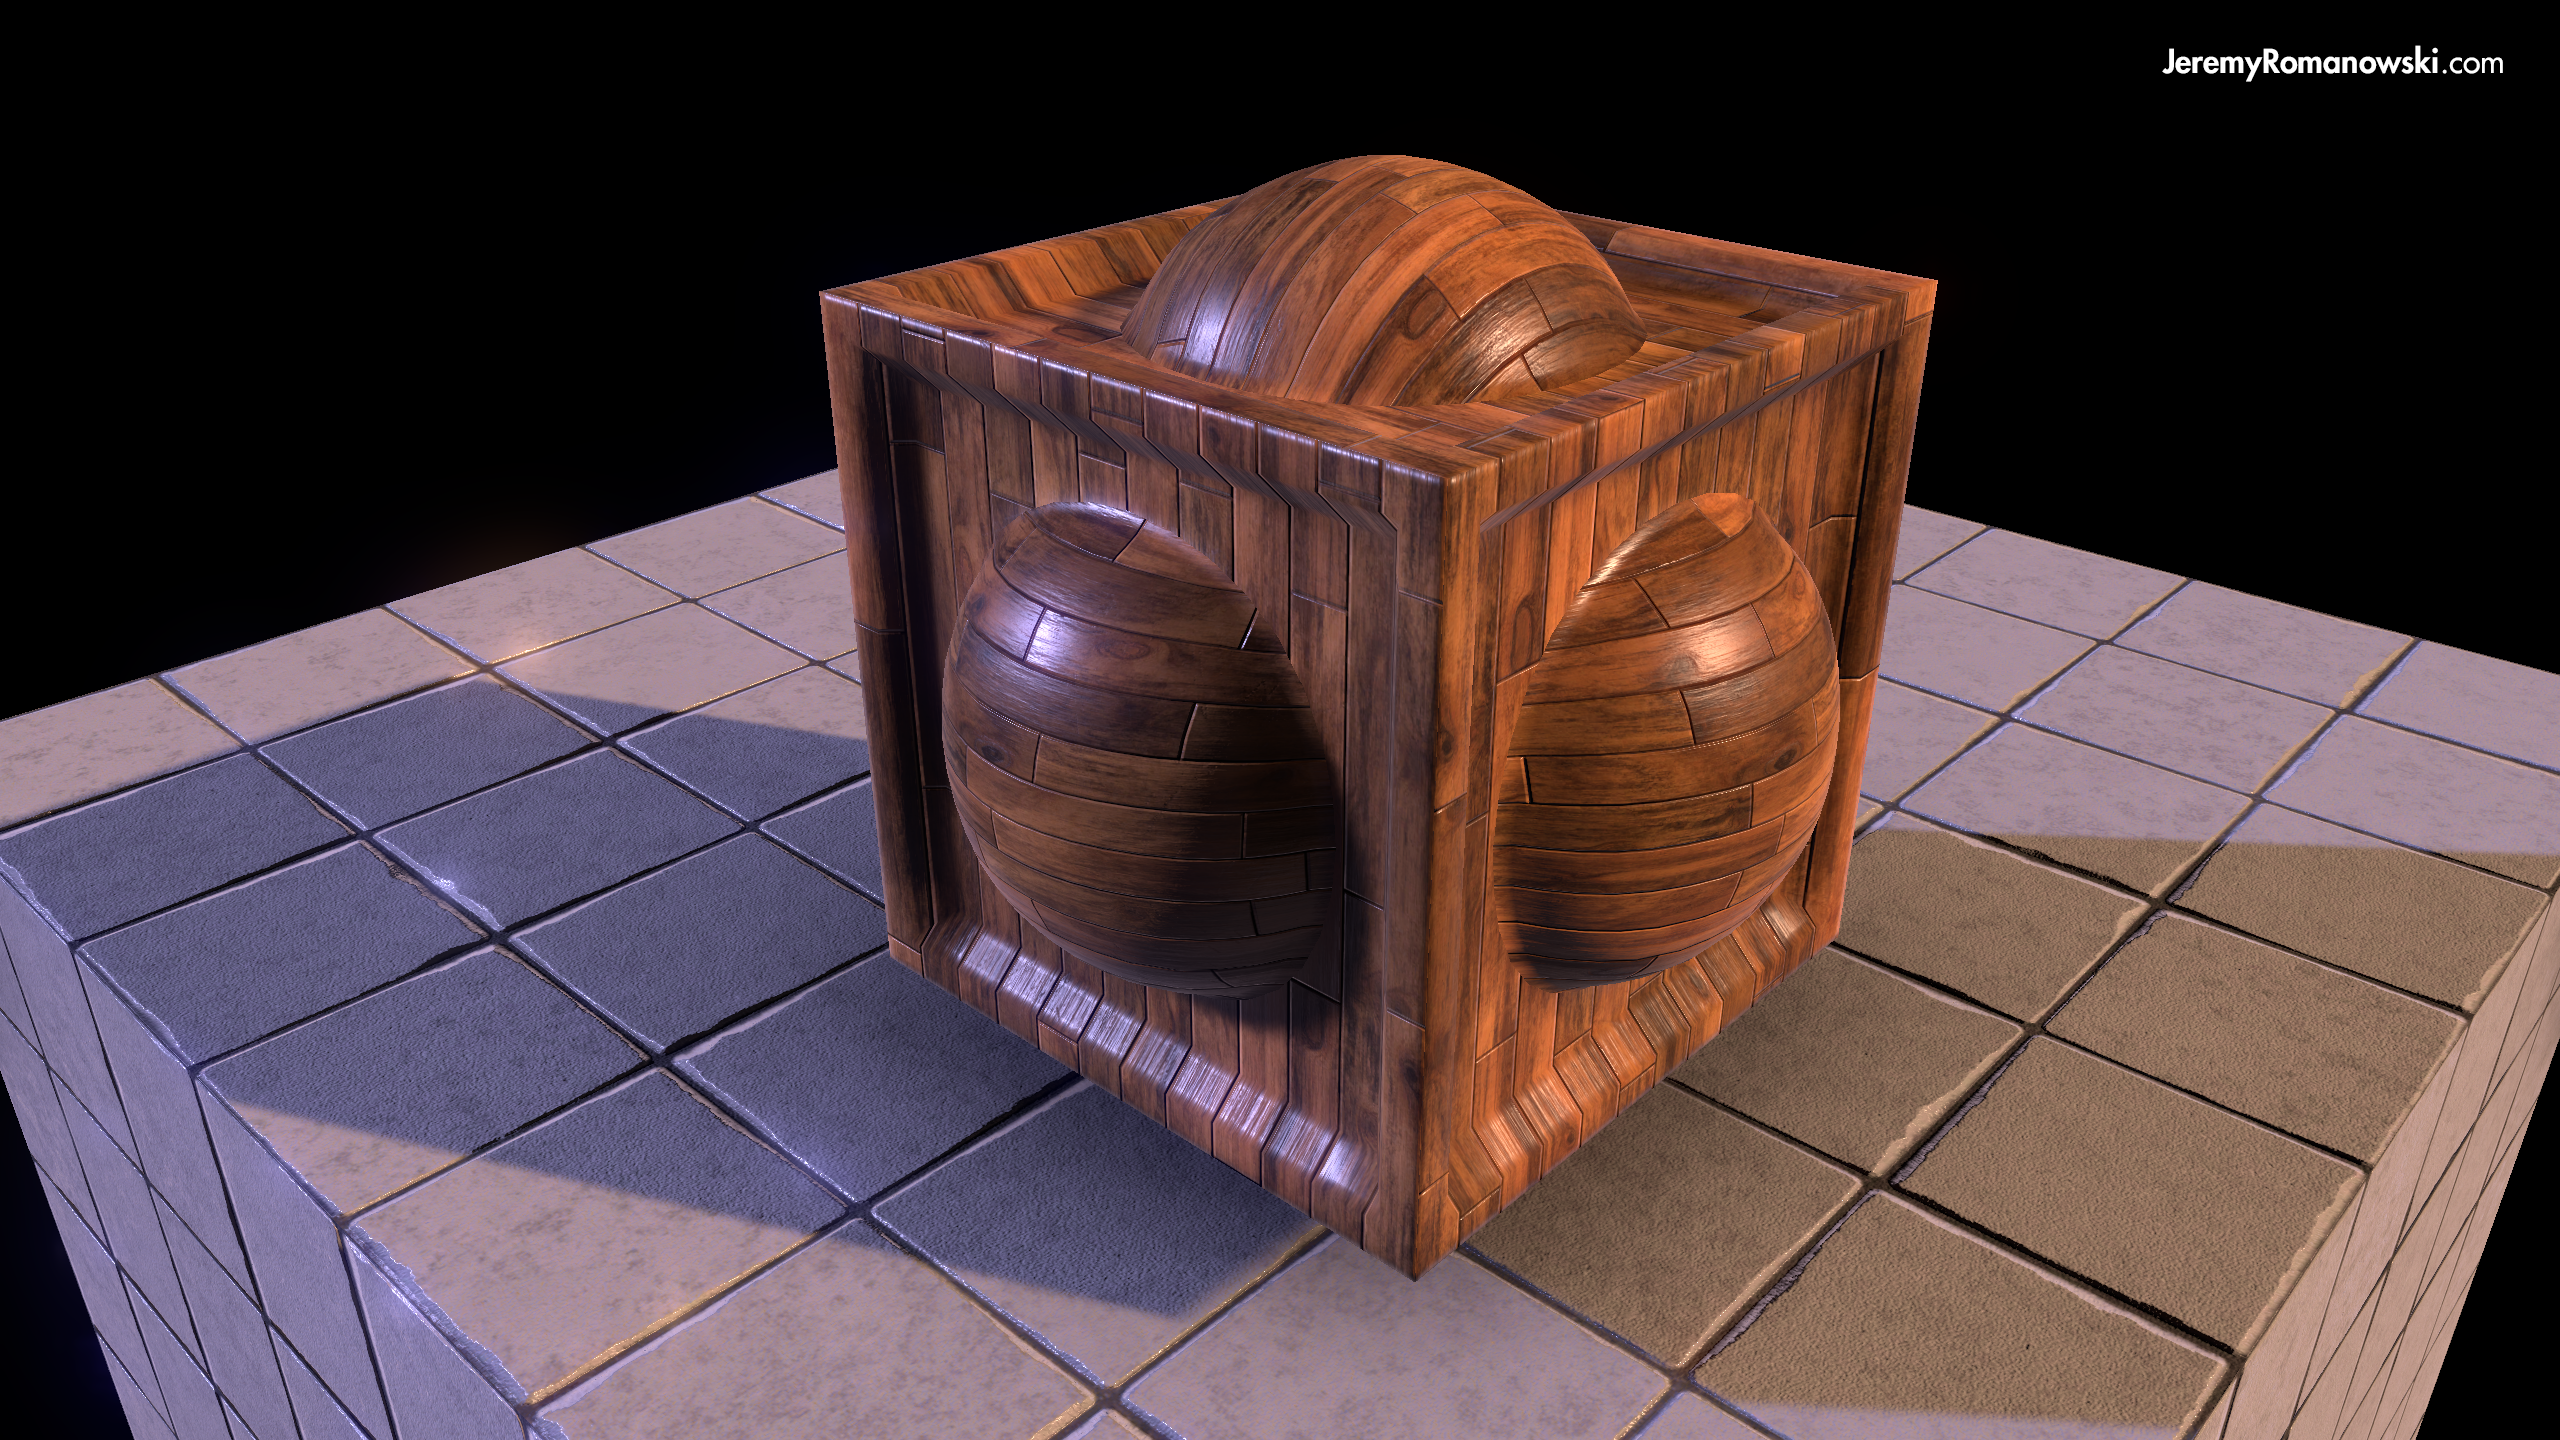
Authoring the Occlusion accurately isn't especially difficult, however, it is imperative to test your Occlusion maps against multiple lighting conditions. Failing to do so may reveal some rather ugly results!
Occlusion information is revealed as Direct Illumination falls off the curved surface.
ABOVE: Spherical surface demonstrating the falloff of direct illumination and subsequent transition to indirect lighting information. The spheres' material is as follows: Albedo value of 255,255,255 (white), 0% Metalness value (black), with a 0% Smoothness value (black). The only supporting map is a binary checkerboard texture found in the Occlusion map slot.
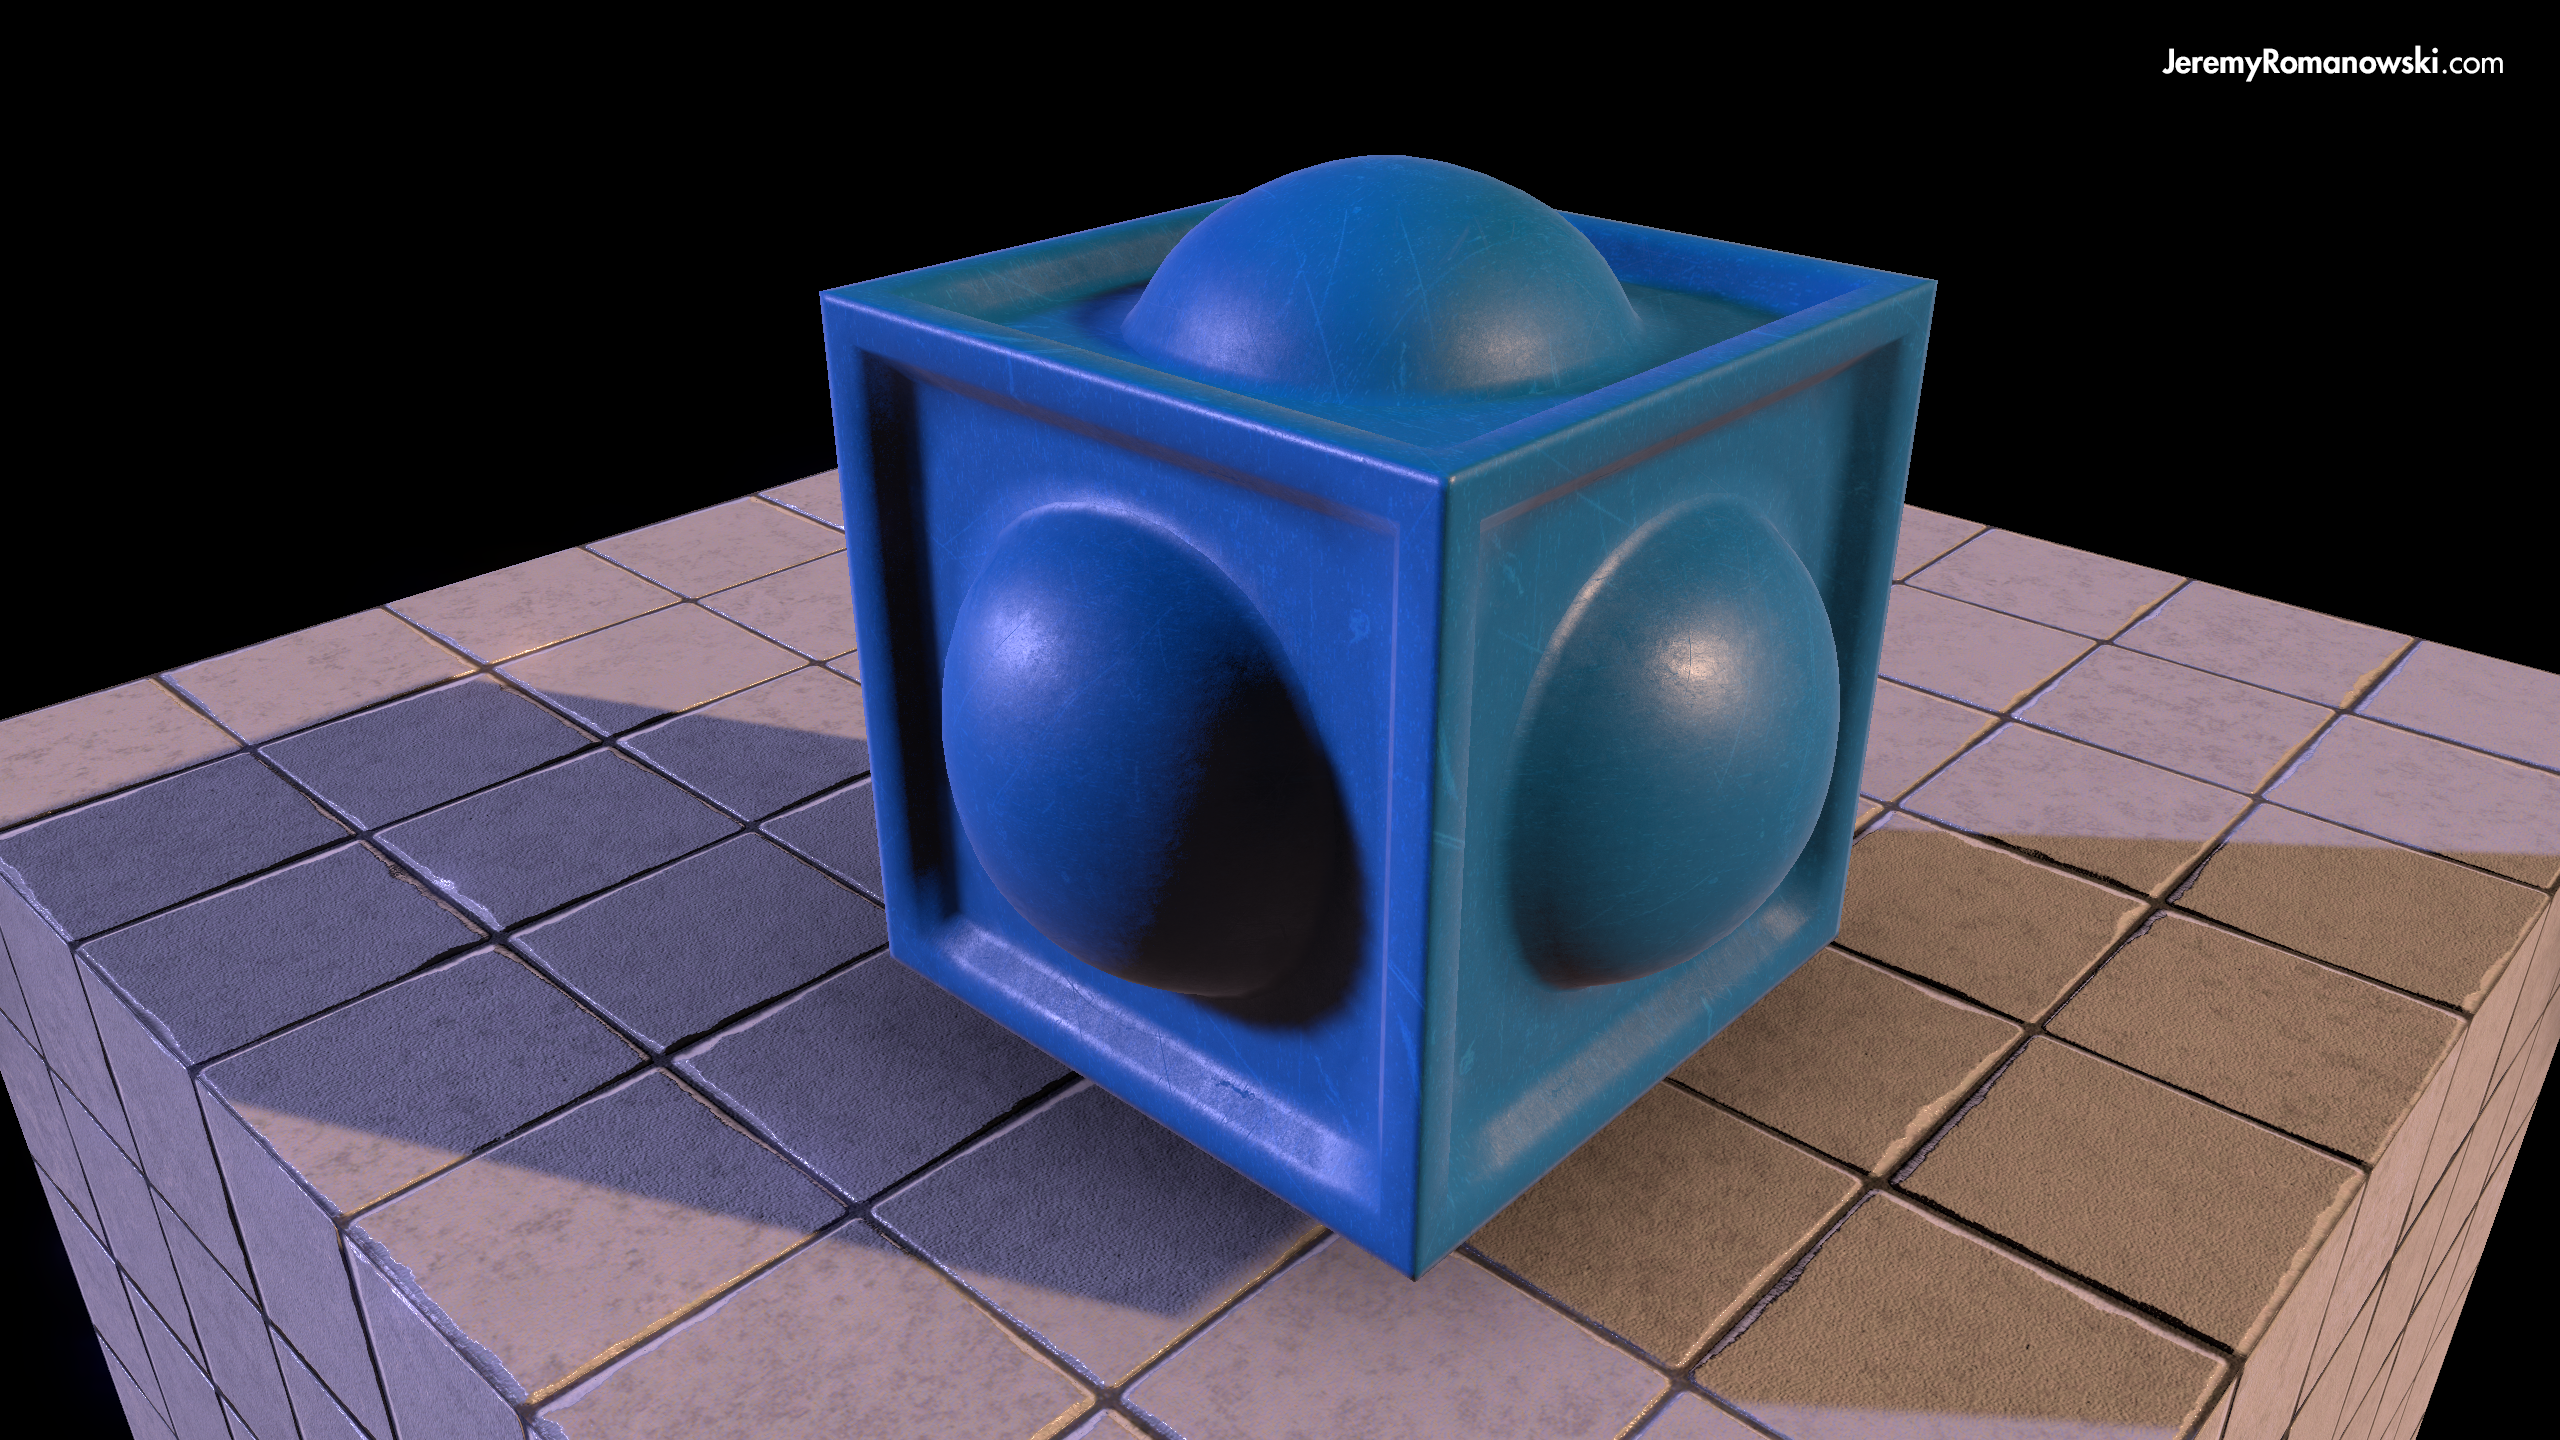
“It’s important to reserve the darkest of occlusion values for only the most obscured and finest of details.”
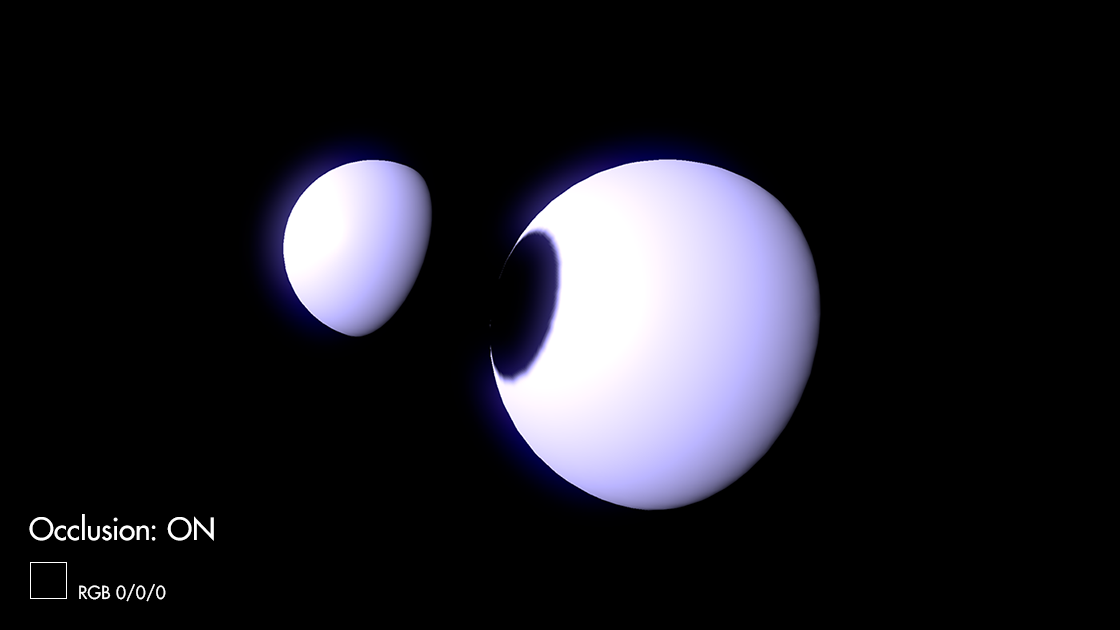

ABOVE: A 100% black Occlusion value tells Unity's lighting engine (Enlighten) that the surface is completely obscured from receiving indirect lighting information, rendering it completely unlit (pitch black, in most cases). While the inverse Occlusion value (0%, white) tells Enlighten to render all available indirect lighting information. It's important to reserve the darkest of occlusion values for only the most obscured and finest of details.
“There is little room for negotiation — if your project isn’t leveraging Pack Maps to the fullest extent possible — you’re leaving performance gains on the table.”
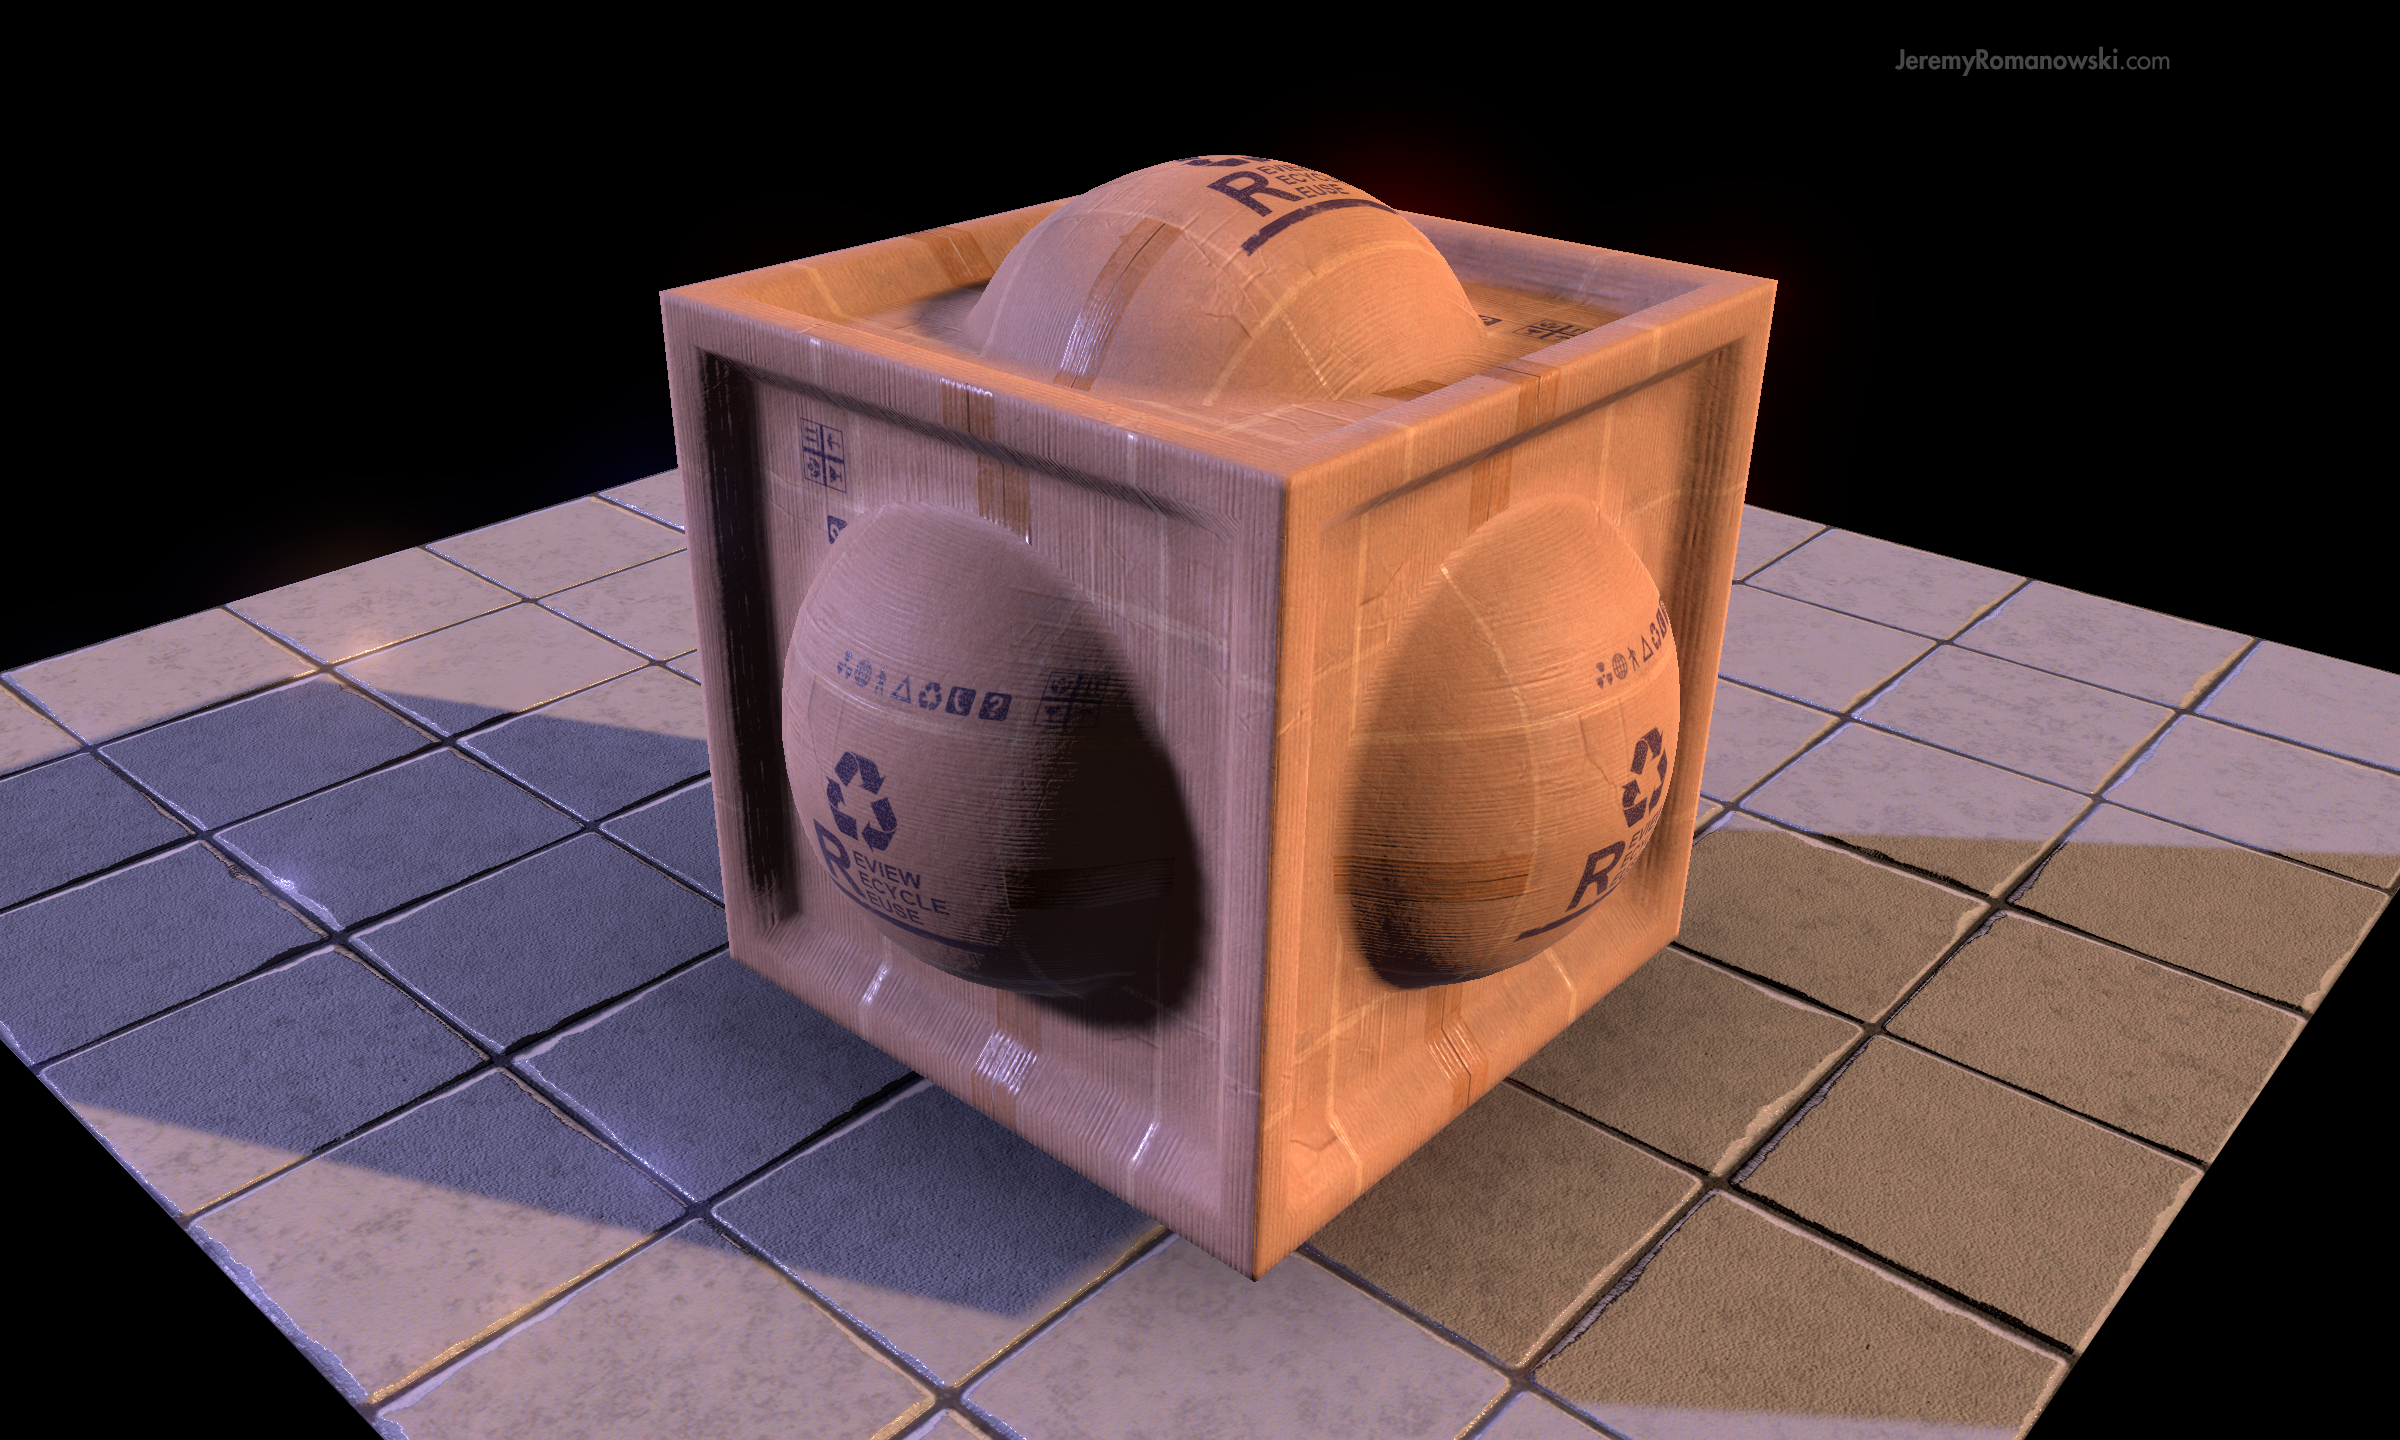
The Pack Map
CLICK FOR FULL SIZE Pack Map
The term Pack Map describes a composite image which contains multiple single-sample (i.e. grayscale) texture maps, each of which is isolated to a unique color channel. (i.e. Red, Green, Blue or the Alpha channel.)
A physically-based material which neglects to leverage a Pack Map (opting for multiple image files, instead) will unnecessarily bloat the memory overhead of the material, as much as 400% in many cases, even more if additional maps are in-play (e.g. detail maps, alpha masks, emissive maps, etc.)
Packing multiple texture maps in a single image file is not a new practice by any means, but it didn't become a crucial step-in-the-process of Unity-based art pipelines until physically based rendering became the standard. This is in large part due to the additional surface maps required for PBR materials. There is little room for negotiation on this matter -- if your project isn't leveraging Pack Maps to the fullest extent possible, you're leaving performance gains on the table; both in terms of project and build size.
So, now that you're (hopefully) sold on the idea of Pack Maps, you'd probably expect just about every art team to be on the Pack Map train, right? Well, that hasn't been my experience, actually. In fact, since the 2014 Unity 5 beta I've worked on half a dozen Unity 5 projects, half of which were well funded, and to my surprise only one of those projects was leveraging Pack Maps when I came on-board. This is of course only my personal experience, but it was from those experiences, in fact, which inspired me to write this guide.
Standard Shader Channel Assignments
Channel Assignments for Unity 5 Standard Shader
Authoring pack maps in photoshop
Above all else, it is recommended that you author all supporting maps (i.e. Metalness, Smoothness, Occlusion) in a separate (PSD) master file! In order to ensure a compatible export, you must export with:
No Layers / Flattened (Background layer w/ Lock icon)
TIFF or TGA (PNG's aren't compatible)
Alpha Channel (Must be included in export options)
Working directly within the Pack Map file (rather than from a separate master file) runs the risk of losing work and/or exporting the image in an incompatible format. When you are ready to create your Pack Map, simply copy one of the maps from the PSD master file (CTRL+SHIFT+C to copy merged) then create a new file (CTRL+N).
Pack Map Channels in Photoshop
By default, Photoshop will retain the dimensions of the clipboard data you just copied (e.g. 1024x1024). Additionally your Background Contents should be set to White or Background Color, never Transparent. (Attempting to compile a Pack Map from a file with a transparent background will add at least 2 additional steps.)
Click OK to create the new Pack Map file with the correct dimensions and opaque background contents. (top right)
Don't paste your map just yet! First you must select the appropriate channel from the Channels window. (right)
For example, you would select the Red Channel if you're in the process of pasting the Metalness Map into your Pack Map. Once you select the correct channel from the Channels Window and Paste (Ctrl+V) your map data from the clipboard, you're all set! Rinse and repeat for the remaining map channels.
Albedo Map
The albedo map is a bit nebulous at times, and usually requires some lookdev to get things dialed in correctly. The main difference between legacy diffuse maps and PBR albedo maps is the stark lack of lighting information. Compared to legacy diffuse, most PBR color maps will look “flat” in comparison.
As with the Smoothness map, testing your color maps against multiple lighting conditions is an important step in the process. And again, as with the Smoothness map, it is a good idea to begin recording the color values for common material types in your game/app.
Unity has provided the below chart of some example values for common surfaces [which use the metal/smooth Standard shader] but keep in mind there is some wiggle room — for example, white gold surfaces include other elements in them which desaturate the deep color we usually associate with something like 24k gold.
CLICK FOR FULL SIZE

And finally, the below is a brightness/saturation range for non-metal surfaces found in PBR environments. Most surfaces in our physical reality fall within this range.
Above: Saturation & Brightness physically-correct sweet-spot. Note: The values correlate to Dielectric/Insulator/Non-Metal surfaces.